Homemade nut butter is a versatile pantry staple that can be easily crafted with a few simple ingredients. Using common kitchen equipment like a high-powered blender or food processor, anyone can transform raw nuts into creamy, nutritious spreads. Making nut butter at home allows for complete control over ingredients and customization of flavors to suit individual preferences.
The process of creating homemade nut butter is straightforward. It typically involves toasting nuts to enhance their flavor, then blending them until they release their natural oils and become smooth. This method works for a variety of nuts, including almonds, cashews, pecans, and more. The resulting nut butters are free from additives and preservatives often found in store-bought versions.
Nutritionally, homemade nut butters offer significant benefits. They are rich in healthy fats, protein, and essential nutrients. By making nut butter at home, individuals can experiment with different nut combinations and add-ins like cocoa, vanilla, or sea salt to create unique flavors that cater to their tastes and dietary needs.
Benefits of Homemade Nut Butter

Homemade nut butter offers numerous advantages for health-conscious individuals and culinary enthusiasts alike. It provides superior nutritional value, allows for complete control over ingredients, and can be more economical than store-bought alternatives.
Nutritional Value
Homemade nut butter is packed with essential nutrients. It contains healthy fats, including monounsaturated and polyunsaturated fats, which support heart health. These butters are naturally cholesterol-free and can be prepared with minimal or no added sodium.
Nuts are rich in protein, fiber, vitamins, and minerals. For example, almonds provide vitamin E, while pistachios offer vitamin B6. Homemade versions retain more of these nutrients compared to heavily processed store-bought options.
The absence of artificial preservatives and additives enhances the nutritional profile. This makes homemade nut butter a wholesome choice for those seeking clean, nutrient-dense foods.
Control Over Ingredients
Making nut butter at home gives complete control over the ingredients. This is particularly beneficial for individuals with dietary restrictions or allergies.
One can choose organic or locally sourced nuts to ensure quality. The ability to roast nuts before processing allows for customization of flavors and aromas.
Sugar content can be regulated or eliminated entirely. Natural sweeteners like honey or maple syrup can be used in moderation if desired.
Additives such as salt, spices, or complementary nuts can be incorporated to create unique flavor profiles. This level of customization is rarely available in commercial products.
Economic Advantages
Preparing nut butter at home can be cost-effective, especially when buying nuts in bulk. This approach often results in savings compared to purchasing premium or organic nut butters from stores.
Homemade versions typically yield more product per pound of nuts used. There’s no need to pay for packaging, marketing, or distribution costs associated with commercial brands.
Making nut butter at home reduces food waste. Small batches can be prepared as needed, ensuring freshness and preventing spoilage.
The initial investment in equipment like a food processor or high-powered blender is offset by long-term savings and versatility in kitchen use.
Essential Equipment

Creating homemade nut butter requires a few key pieces of equipment for optimal results. The right tools ensure smooth, creamy textures and convenient storage.
Choosing the Right Blender
A powerful food processor or high-speed blender is crucial for making nut butter. Food processors often work best, as their wide bowl allows for easy scraping and even blending. Look for models with at least 700 watts of power to handle tough nuts.
High-speed blenders can also produce excellent results, especially for smaller batches. Brands like Vitamix or Blendtec offer the necessary power to break down nuts into a smooth consistency.
Consider the capacity of the appliance. A larger bowl or pitcher allows for bigger batches, saving time in the long run.
Regular pausing and scraping down the sides ensures even blending. Some food processors come with a specific nut butter attachment, which can be helpful but isn’t essential.
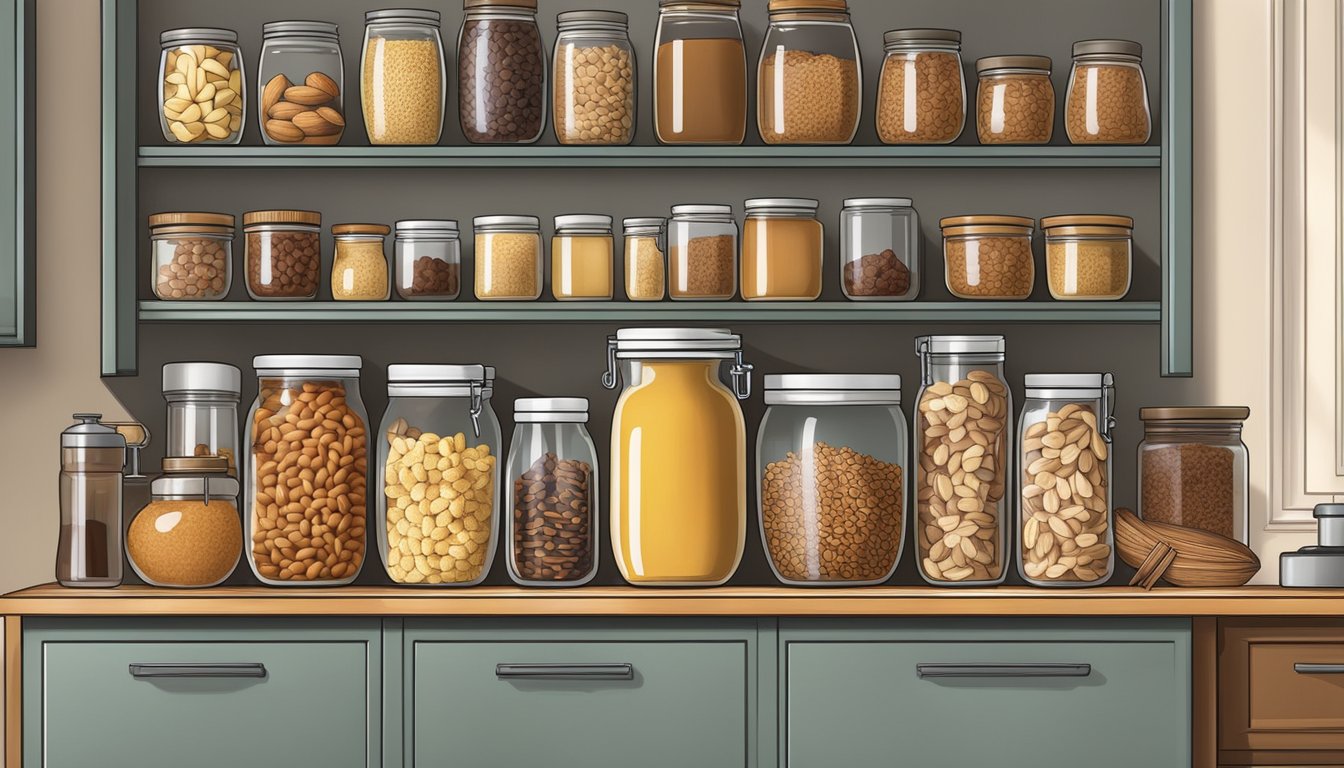
Storage Solutions
Proper storage extends the shelf life of homemade nut butter. Glass jars with tight-fitting lids work well and don’t retain odors or flavors.
Airtight containers are essential to prevent oxidation and maintain freshness. Mason jars or repurposed glass jars from store-bought nut butter are excellent options.
Consider the size of your containers. Smaller jars allow for portion control and reduce exposure to air when opened frequently.
Store nut butter in a cool, dark place to prevent rancidity. Most homemade varieties last 1-3 months at room temperature or up to 6 months in the refrigerator.
Label containers with the date of preparation to track freshness. Stir refrigerated nut butter before use, as natural separation may occur.
Selecting Nuts and Seeds

Choosing the right nuts and seeds is crucial for creating delicious homemade nut butters. The type of nut or seed you select will determine the flavor, texture, and nutritional profile of your final product.
Roasted vs Raw Nuts
Raw nuts offer a milder flavor and retain more nutrients. They’re ideal for those seeking a pure, unadulterated taste. Almonds, cashews, and peanuts are popular choices for raw nut butters.
Roasted nuts provide a richer, more intense flavor. The roasting process enhances their natural oils, making them easier to blend. Hazelnuts and pecans benefit greatly from roasting, developing a deeper, nuttier taste.
For optimal results, roast nuts at 350°F (176°C) for 8-12 minutes. This brings out their natural flavors and oils, simplifying the blending process.
Benefits of Soaking
Soaking nuts and seeds before processing can improve digestibility and nutrient absorption. This technique is particularly beneficial for almonds, walnuts, and pumpkin seeds.
To soak, cover nuts or seeds with water and let them sit for 4-8 hours. Drain and rinse thoroughly before use. Soaking reduces phytic acid, which can interfere with mineral absorption.
Soaked nuts may require longer blending times to achieve a smooth consistency. They’re best suited for those prioritizing nutritional benefits over convenience.
Sunflower seeds and pistachios are excellent choices for soaking, as they become notably creamier after this process.
Creating the Base Recipe
Making homemade nut butter is a simple process that yields delicious results. The key steps involve roasting nuts and blending them until creamy. Achieving the right texture requires patience and attention to detail.
Basic Steps
Preheat the oven to 350°F (176°C). Spread raw nuts on a baking sheet in a single layer. Roast for 8-12 minutes, stirring once halfway through, until fragrant and lightly golden. Let the nuts cool for 2-3 minutes.
Transfer warm nuts to a food processor. Add 1/2 teaspoon of salt. Process on high speed, stopping to scrape down the sides as needed. Blend for 4-12 minutes, depending on the nut type and desired consistency.
Some nuts release oils faster than others. Almonds and cashews typically blend smoothly, while pecans may take longer.
Achieving Creamy Texture
Patience is crucial for creamy nut butter. The mixture will go through stages: chopped, grainy, clumpy, and finally smooth. Don’t stop blending too early.
If the butter seems dry, add 1-2 teaspoons of neutral oil like coconut or avocado oil. This helps achieve a silky texture.
For extra smoothness, use a high-powered blender instead of a food processor. It creates finer particles and a more uniform consistency.
Let the nut butter cool completely before storing. It will thicken slightly as it cools. Store in an airtight container in the refrigerator for up to 3 weeks.
Flavoring Your Nut Butter

Homemade nut butter offers endless opportunities for customization. Adding carefully chosen ingredients can transform a simple spread into a gourmet treat.
Sweetening Options
Natural sweeteners enhance nut butter’s flavor without overpowering its nutty essence. Honey adds a floral sweetness and smooth texture. Drizzle in 1-2 tablespoons per cup of nut butter, adjusting to taste. Maple syrup imparts a rich, caramel-like flavor. Start with 1 tablespoon per cup and increase if desired.
For a lower-glycemic option, try coconut sugar. Its subtle caramel notes complement most nuts. Use 1-2 teaspoons per cup of nut butter. Stevia offers sweetness without calories. Add tiny amounts, as it’s very potent.
Vanilla extract elevates sweetness. A quarter teaspoon per cup of nut butter adds depth without dominating.
Savory Additions
Sea salt is essential for balancing flavors in nut butter. Add 1/4 teaspoon per cup of nuts. For a savory twist, try smoked sea salt.
Spices like cinnamon, nutmeg, and cardamom add warmth. Start with 1/4 teaspoon of cinnamon per cup of nut butter. Combine with a pinch of nutmeg for a classic pairing.
Savory herbs like rosemary or thyme create unique spreads. Use sparingly – 1/8 teaspoon dried herbs per cup of nut butter.
Roasted garlic adds depth to savory nut butters. Blend in 1-2 cloves per cup of nuts.
Exotic Flavors
Matcha powder creates vibrant green tea-flavored nut butter. Add 1-2 teaspoons per cup of nuts. It pairs well with cashews or macadamias.
Curry powder transforms nut butter into a complex spread. Start with 1/4 teaspoon per cup of nuts, adjusting to taste. It works best with neutral nuts like cashews.
Cocoa powder makes chocolate nut butter. Use 2 tablespoons per cup of nuts. Combine with sweetener for a healthier “Nutella” alternative.
Freeze-dried fruit adds color and tang. Crush 2 tablespoons of freeze-dried strawberries or raspberries into almond or cashew butter.
Exciting Variations
Nut butter enthusiasts can explore a range of creative options beyond basic recipes. These variations add new flavors and textures while accommodating different dietary needs and preferences.
Chocolate Infused
Chocolate hazelnut butter offers a homemade alternative to store-bought spreads. Mix roasted hazelnuts with cocoa powder, a touch of sweetener, and a pinch of salt for a luxurious treat. Almond butter pairs well with dark chocolate, creating a rich spread perfect for toast or fruit dipping.
For a unique twist, blend cashew butter with white chocolate. The creamy cashews complement the sweet white chocolate, resulting in a decadent spread. Experiment with different cocoa percentages to find the ideal chocolate intensity for your taste buds.
Seed-Based Butters
Sunflower seed butter provides a nutty flavor without using nuts. It’s an excellent option for those with nut allergies. Roast sunflower seeds before blending for enhanced taste.
Pumpkin seed butter offers a distinctive green hue and nutrient-rich profile. It pairs well with cinnamon and maple syrup for a fall-inspired spread.
Hemp seed butter boasts a high protein content. Its earthy flavor complements savory dishes and can be used in dressings or sauces.
Nut-Free Alternatives
Coconut butter, made from blended dried coconut, serves as a creamy, tropical alternative to nut butters. It solidifies at room temperature, making it suitable for energy bars or as a topping for baked goods.
Soy butter, crafted from roasted soybeans, mimics the texture of peanut butter. It’s protein-rich and works well in sandwiches or smoothies.
Oat butter, though less common, offers a unique option. Blend toasted oats with a neutral oil and sweetener for a spread that pairs well with fruit or oatmeal.
Creative Uses for Nut Butter
Nut butter offers versatility beyond simple spreads. Its rich flavor and creamy texture enhance a variety of dishes from breakfast to dessert.
Breakfast Ideas
Add a spoonful of almond butter to morning smoothies for extra protein and richness. Blend banana, spinach, almond milk, and almond butter for a nutritious start. Swirl peanut butter into oatmeal along with sliced apples and a drizzle of honey.
Create nut butter-stuffed French toast by spreading cashew butter between two slices of bread before dipping in egg mixture and cooking. Top whole grain toast with a layer of sunflower seed butter, sliced strawberries, and a sprinkle of chia seeds for a quick, balanced meal.
Healthy Snacks
Mix equal parts nut butter and Greek yogurt for a protein-packed dip. Serve with apple slices or celery sticks. Roll banana pieces in peanut butter and coat with granola for bite-sized energy balls.
Make homemade granola bars by combining oats, chopped nuts, dried fruit, and melted nut butter. Press into a pan and refrigerate until firm. Spread almond butter on rice cakes and top with thin cucumber slices for a crunchy, satisfying snack.
Dessert Creations
Swirl nut butter into brownie batter before baking for added depth of flavor. Create no-bake cookies by mixing oats, cocoa powder, and nut butter with a touch of honey. Form into balls and chill.
Blend frozen bananas with peanut butter for a creamy, dairy-free ice cream alternative. Top with chopped peanuts and a drizzle of melted dark chocolate. Make nut butter cups by filling mini muffin liners with melted chocolate, adding a dollop of nut butter, and covering with more chocolate. Freeze until set.
Health Considerations

Homemade nut butters offer nutritional benefits but require careful consideration of individual dietary needs. Proper portion control and awareness of allergies are essential for safe consumption.
Allergies and Restrictions
Nut allergies are common and can be severe. Individuals with known nut allergies should avoid all nut butters. Cross-contamination is a risk when making homemade nut butters, so separate equipment is advisable for those with allergies in the household.
Many nut butters are naturally gluten-free and vegan, making them suitable for various dietary restrictions. However, added ingredients should be checked for compliance.
Keto-friendly options include almond, macadamia, and pecan butters due to their low carbohydrate content.
Balancing Macros
Nut butters are calorie-dense, with most containing 90-100 calories per tablespoon. They’re rich in healthy fats and provide a moderate amount of protein.
Almonds and pistachios offer higher protein content, with about 7 grams per 2-tablespoon serving. Macadamia nuts are lower in protein but higher in monounsaturated fats.
For balanced nutrition, pair nut butters with complex carbohydrates. A tablespoon of nut butter on whole grain toast or celery sticks can make a satisfying, nutrient-rich snack.
Portion control is key to avoiding excessive calorie intake. Using measuring spoons or a food scale can help maintain appropriate serving sizes.
Preservation and Storage

Proper storage techniques are crucial for maintaining the quality and safety of homemade nut butter. Airtight containers and refrigeration play key roles in extending shelf life.
Optimum Conditions
Store homemade nut butter in an airtight container to protect it from air and moisture. Glass jars with tight-fitting lids work well for this purpose.
Refrigeration is recommended to maximize shelf life. At room temperature, natural nut butters typically last 1-3 months. When refrigerated, they can stay fresh for 3-6 months.
For longer-term storage, freezing is an option. Freeze nut butter in small portions for easy thawing. Frozen nut butter can last up to 6 months.
Signs of Spoilage
Check nut butter regularly for signs of spoilage. A rancid odor is a clear indicator that the oils have gone bad.
Visual cues include mold growth, which appears as fuzzy spots on the surface. Discoloration or darkening of the nut butter can also signal spoilage.
Changes in texture, such as separation or graininess, are normal and not signs of spoilage. Simply stir the nut butter to recombine.
If any signs of spoilage are present, discard the entire batch to avoid potential foodborne illness.
DIY Nut Butter Recipes
Homemade nut butters offer endless flavor possibilities and allow for customization of ingredients. These recipes showcase classic and creative options using simple pantry staples.
Classic Peanut Butter
Roast raw peanuts at 350°F for 10-12 minutes until golden and fragrant. Let cool slightly. Add warm peanuts to a food processor with 1/2 teaspoon salt. Process for 5-7 minutes, scraping down sides as needed, until smooth and creamy.
For extra flavor, mix in 1 tablespoon honey or maple syrup. Add 1-2 tablespoons peanut oil if a thinner consistency is desired. Store in an airtight container in the refrigerator for up to 1 month.
Variations: Stir in cinnamon, vanilla extract, or chia seeds for added nutrition and flavor.
Rich Almond Chocolate Spread
Toast 2 cups almonds at 350°F for 8-10 minutes. Process warm nuts with 1/4 cup cocoa powder, 1/4 cup powdered sugar, and a pinch of salt. Blend for 10-12 minutes until smooth.
Add 2-3 tablespoons melted dark chocolate and 1 teaspoon vanilla extract. Process until well combined. For a Nutella-like consistency, mix in 2 tablespoons neutral oil.
Customize with add-ins like toasted coconut flakes or a drizzle of date syrup. Refrigerate in a sealed container for up to 2 weeks.
Tropical Cashew Blend
Roast 2 cups cashews at 325°F for 5-7 minutes. Process nuts with 1/4 cup toasted unsweetened coconut flakes, 1 tablespoon coconut oil, and 1/8 teaspoon salt.
Blend for 8-10 minutes, scraping sides as needed. Add 2 tablespoons honey and 1/2 teaspoon vanilla extract. Process until smooth and creamy.
Mix in 2 tablespoons dried pineapple pieces for added tropical flavor. For extra nutrition, incorporate 1 tablespoon each of chia seeds and ground flax seeds.
Store in the refrigerator for up to 3 weeks. Stir before using, as separation may occur.
Enhancing Your Recipes
Homemade nut butter offers endless possibilities for customization. By adding select ingredients, you can create unique flavors to suit any taste preference.
Sweet Spreads
Sweeteners transform plain nut butter into delectable treats. Honey or maple syrup add natural sweetness, while coconut sugar provides a caramel-like flavor. Start with 1-2 tablespoons per cup of nut butter and adjust to taste.
Cocoa powder creates a chocolatey spread reminiscent of popular store-bought versions. Mix in 2-3 tablespoons per cup of nut butter for a rich chocolate taste.
Vanilla extract enhances the nutty flavors. Add 1/2 teaspoon per cup for subtle sweetness and aroma.
Coconut oil improves spreadability and adds a tropical note. Incorporate 1-2 tablespoons per cup while blending.
Spicy Twists
Cayenne pepper adds a spicy kick to nut butter. Start with 1/4 teaspoon per cup and increase gradually to achieve desired heat level.
Cinnamon pairs well with most nuts, offering warmth and subtle sweetness. Use 1/2 teaspoon per cup for a balanced flavor.
Ginger powder provides a zesty, slightly spicy taste. Add 1/4 teaspoon per cup for a gentle zing.
Sea salt enhances all flavors. A pinch per cup brightens the taste profile of any nut butter variation.
Experimenting with these additions allows for personalized spreads tailored to individual preferences.
Presentation and Packaging

Attractive presentation and thoughtful packaging elevate homemade nut butters from simple spreads to gourmet creations. Careful attention to visual appeal and functional design can transform these pantry staples into desirable gifts or marketable products.
Gifting Ideas
Glass jars with tight-fitting lids make excellent containers for gifting nut butters. Clear jars showcase the creamy texture and rich color of the spread. Adding a personalized label with ingredients and a “best by” date adds a professional touch. Decorative ribbons or twine can be tied around the jar’s neck for a festive appearance.
For an extra special presentation, consider creating a gift basket. Pair the nut butter with artisanal bread, gourmet crackers, or fresh fruit. Include a small wooden spreader or a recipe card suggesting unique ways to enjoy the nut butter.
Selling Your Creations
When selling homemade nut butters, professional packaging is crucial. Invest in food-grade containers with tamper-evident seals to ensure product safety and freshness. Design eye-catching labels that comply with local food labeling regulations. Include the product name, ingredients, net weight, and any allergen warnings.
Create a cohesive brand identity with consistent label design across different nut butter varieties. Consider offering a nutritional analysis on the label to appeal to health-conscious consumers. High-quality product photos and recipe videos can boost online sales and social media marketing efforts.
For farmers’ markets or craft fairs, design an attractive display that showcases the range of flavors available. Offer small tasting samples to entice potential customers. Provide recipe cards or QR codes linking to online recipe ideas to inspire purchases.