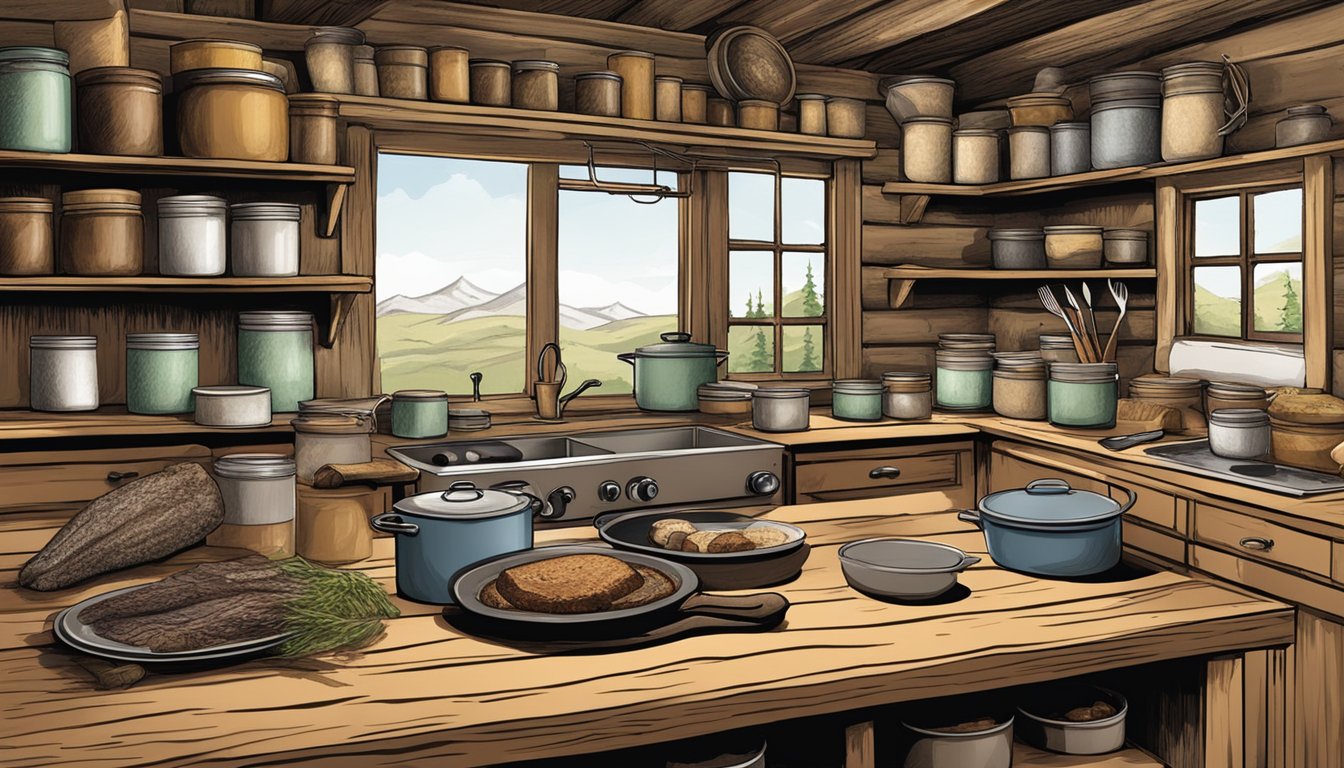
Hunters who have successfully stocked their pantries with jars of canned venison can now explore a variety of delicious recipes to make the most of their preserved game meat. Canned venison offers a convenient and versatile ingredient for quick, flavorful meals throughout the year. Canned venison can be used in soups, stews, sandwiches, and appetizers, providing a rich source of protein and a unique taste that appeals to many game meat enthusiasts.
The canning process, typically done using a pressure canner, helps preserve the venison’s flavor and tenderness while ensuring its safety for long-term storage. This method allows hunters to enjoy their harvest long after the hunting season has ended. With a well-stocked pantry of canned venison, creating hearty meals becomes a simple task, perfect for busy weeknights or impromptu gatherings.
From warming stews to savory sandwich fillings, canned venison recipes offer hunters a way to showcase their culinary skills and share the fruits of their hunting efforts with family and friends. These recipes often require minimal preparation, making them ideal for those who appreciate both convenience and the distinct taste of wild game.
Understanding Canned Venison
Canned venison is a shelf-stable form of wild game meat that offers hunters a practical way to preserve their harvest. This method of food preservation extends the usability of deer meat far beyond the hunting season.
The process involves cutting venison into cubes, removing fat and silverskin, and packing it into jars. Proper canning techniques are crucial to ensure food safety and longevity.
Canned venison retains much of its nutritional value and develops a tender texture during the canning process. It’s a versatile ingredient that can be used in various recipes, from stews to pasta dishes.
Some key benefits of canned venison include:
- Long shelf life (up to 2-5 years when properly stored)
- Ready-to-use meat for quick meal preparation
- Frees up freezer space
- Preserves meat without electricity
Hunters can customize their canned venison by adding seasonings or vegetables during the canning process. This allows for creating pre-seasoned meat that’s ready for specific dishes.
It’s important to follow USDA-approved canning methods and use a pressure canner to ensure safe preservation. Proper sealing and processing at the correct pressure are essential to prevent spoilage and foodborne illness.
Benefits of Canning Venison
Canning venison offers hunters a practical way to preserve their harvest. This method eliminates the need for freezer space, allowing for long-term storage at room temperature.
Pressure canning ensures the meat remains safe to eat for extended periods. The process kills harmful bacteria and creates a sealed environment that prevents spoilage.
Canned venison provides a convenient option for quick meals. The meat is pre-cooked during the canning process, making it ready to use straight from the jar.
This preservation technique maintains the nutritional value of venison. The canning process locks in proteins, vitamins, and minerals, ensuring a healthy meal option.
Hunters can enjoy their venison year-round with canned preparations. This extends the availability of game meat beyond hunting season.
Canned venison offers versatility in cooking. It can be easily incorporated into various recipes, from stews and soups to casseroles and sandwiches.
The canning process can help tenderize tougher cuts of venison. This makes it an excellent method for utilizing all parts of the deer.
Canned venison serves as an emergency food source. Its long shelf life and easy storage make it ideal for preparedness situations.
Selecting the Right Equipment

Proper equipment is crucial for safely and effectively canning venison. The right tools ensure food safety, preserve quality, and make the process more efficient.
Pressure Canners & Cookers
Pressure canners are essential for canning low-acid foods like venison. These devices reach temperatures above boiling, killing harmful bacteria. Choose a canner with a gauge to monitor pressure accurately.
Look for models with safety features like locking lids and pressure release valves. Canners come in various sizes – 16 to 23 quarts are common for home use. Larger sizes process more jars at once but require more storage space.
Maintain your canner properly. Replace gaskets and safety plugs as needed. Always follow the manufacturer’s instructions for use and care.
Canning Jars and Lids
Use clean, sterilized canning jars designed for pressure canning. Mason jars are a popular choice, available in pint and quart sizes. Inspect jars for cracks or chips before use.
Two-piece lids are standard:
- Flat lids (single-use)
- Screw bands (reusable)
Ensure lids fit properly and are free from defects. New lids for each batch guarantee a proper seal. Store unused lids in a cool, dry place to prevent deterioration.
Wide-mouth jars are easier to fill and clean. Regular-mouth jars work well for liquid-heavy recipes.
Essential Canning Tools
A jar lifter is indispensable for safely removing hot jars from the canner. Its rubber-coated grips provide a secure hold.
Other useful tools include:
- Bubble remover and headspace tool
- Funnel for neat jar filling
- Magnetic lid wand
- Clean cloth for wiping jar rims
A kitchen scale helps measure ingredients accurately. Tongs and heat-resistant gloves offer additional safety when handling hot equipment.
Invest in high-quality stainless steel tools for durability. Keep all equipment clean and in good condition for optimal performance.
Preparing Your Venison
Proper preparation is crucial for delicious and safe canned venison. Careful trimming, choosing the right packing method, and adding appropriate liquids and seasonings are key steps in the process.
Trimming and Cutting
Start by trimming the venison of excess fat and connective tissue. Remove all silverskin, as it can become tough during canning. Cut the meat into uniform 1-inch cubes for even cooking and easy packing. Smaller, consistent pieces ensure thorough heat penetration during processing.
Inspect each piece carefully, discarding any with signs of spoilage or freezer burn. Use a sharp knife to make clean cuts, avoiding crushing or tearing the meat fibers. This preserves the texture and flavor of the venison.
For best results, chill the meat thoroughly before cutting. Cold meat is easier to handle and maintains its shape better during the cubing process.
Hot Pack vs. Raw Pack Method
The hot pack method involves pre-cooking the venison before canning. Lightly brown the cubed meat in a skillet to enhance flavor and reduce the volume. This allows for more meat per jar and improves shelf stability.
The raw pack method skips pre-cooking. Simply pack raw venison cubes directly into clean, sterilized jars. This method is quicker but may result in a slightly different texture and flavor profile.
Both methods are safe when following proper canning procedures. Hot pack often yields a more consistent product, while raw pack preserves more of the meat’s natural juices.
Adding Liquids and Seasonings
Enhance the flavor of your canned venison with carefully chosen liquids and seasonings. Add beef broth to each jar for extra richness and moisture. A tablespoon per pint jar is typically sufficient.
Create a seasoning mixture using salt, black pepper, and your preferred herbs. Garlic powder, onion powder, and thyme complement venison well. Use about 1 teaspoon of seasoning mix per pint jar.
For added flavor, include small pieces of onion or garlic cloves in each jar. Experiment with different combinations to find your perfect blend. Remember to leave proper headspace in the jars for safe processing.
Table: Recommended Additions Per Pint Jar
| Ingredient | Amount |
|---|---|
| Beef Broth | 1 tablespoon |
| Seasoning Mix | 1 teaspoon |
| Onion | 2-3 small pieces |
| Garlic Clove | 1 small clove |
Canning Process Step by Step
Canning venison preserves the meat safely for long-term storage. This process involves carefully filling jars, removing air bubbles, adjusting headspace, and proper sealing and processing.
Filling the Jars
Start with clean, sterilized quart jars. Cut venison into 1-inch cubes or strips across the grain. For raw pack method, place raw meat directly into jars. For hot pack, briefly brown the meat first. Fill jars loosely, leaving 1-inch headspace at the top.
Add 1 teaspoon of canning salt per quart if desired. For hot pack, pour hot broth over the meat, maintaining the 1-inch headspace. Raw pack doesn’t require additional liquid.
Use a wide-mouth funnel to prevent spills. Pack meat evenly but don’t compress it tightly. This allows heat to penetrate effectively during processing.
Removing Air Bubbles
Air pockets in canned venison can lead to improper sealing and potential spoilage. Use a plastic or wooden utensil to gently stir the contents. This helps release trapped air bubbles.
Run the tool around the inside edge of the jar. Press inward slightly to dislodge any hidden pockets. Avoid using metal utensils, as they may scratch the glass.
Tap jars gently on a padded surface to encourage bubbles to rise. Repeat the stirring process as needed until no more bubbles appear.
Adjusting Headspace
Proper headspace is crucial for safe canning. After removing air bubbles, check that 1 inch of space remains between the top of the venison (and liquid if using) and the jar rim.
If needed, add more meat or liquid to achieve the correct headspace. Too little space may cause contents to expand and break the seal. Too much can result in incomplete processing.
Use a headspace measuring tool or a clean ruler for accuracy. Wipe jar rims with a clean, damp cloth to remove any residue that could prevent proper sealing.
Sealing and Processing
Place new, clean lids on jars. Screw on bands fingertip-tight. Over-tightening can prevent proper venting during processing.
Load filled jars into a pressure canner. Follow manufacturer’s instructions for adding water and venting. Process quarts at 10 pounds pressure (adjust for altitude) for 90 minutes.
Allow canner to cool naturally. Remove jars and let them cool undisturbed for 12-24 hours. Check seals before storing. Properly processed jars of venison can be stored in a cool, dark place for up to one year.
After the Canner: Post-Processing

Proper handling of canned venison after processing ensures safety and quality. Cooling jars correctly and verifying seals are crucial steps for shelf-stable results.
Cooling and Storage
Remove jars from the canner using jar lifters. Place them on a towel-covered countertop, spaced apart to cool evenly. Let jars sit undisturbed for 12-24 hours. Do not tighten bands or test seals during this time.
After cooling, remove bands and check that lids have sealed. Store sealed jars in a cool, dark place. Label with contents and date. For best quality, use within 1 year. Refrigerate any unsealed jars and use within 3-4 days.
Checking the Seals
Test seals after jars have cooled completely. Press the center of each lid – it should not flex. Remove the band and gently lift the jar by the edges of the lid. The lid should stay firmly attached.
Alternatively, tap the lid with a spoon. A clear, ringing sound indicates a good seal. A dull sound may mean the seal is poor. Any jars that have not sealed properly should be refrigerated and used promptly.
Inspect jars for signs of spoilage before use. Discard any with bulging lids, leaks, or off-odors. When opening, listen for a popping sound as the seal breaks.
Safety Tips and Considerations

Proper canning techniques are crucial when preserving venison. Botulism spores pose a significant risk if safety guidelines are not followed meticulously.
Always use a pressure canner for canning venison. Water bath canning is not sufficient to eliminate botulism spores in low-acid foods like meat.
Clean and sterilize all equipment thoroughly before use. This includes jars, lids, and utensils. Inspect jars for cracks or chips that could compromise the seal.
Follow USDA-approved canning guidelines for processing times and pressures. These vary based on jar size and altitude. Do not deviate from recommended procedures.
Remove air bubbles from jars before sealing. Trapped air can interfere with proper heat penetration during processing.
Allow jars to cool naturally after processing. Rapid cooling may cause seal failure. Check seals after 24 hours and refrigerate any unsealed jars.
Store pressure canned venison in a cool, dark place. Label jars with contents and date. Use within 1 year for best quality.
Discard any jars with signs of spoilage, including bulging lids, off-odors, or discoloration. When in doubt, throw it out.
Creative Canned Venison Recipes
Canned venison offers versatility for quick and flavorful meals. These recipes transform preserved deer meat into satisfying dishes perfect for hunters and venison enthusiasts.
Canned Venison Stew
Canned venison stew combines tender meat with hearty vegetables for a comforting meal. Hunters can prepare this dish easily using their preserved venison.
To start, heat canned venison in a large pot. Add diced potatoes, carrots, and onions. Pour in beef broth and season with thyme, rosemary, and black pepper. Simmer until vegetables are tender.
For a thicker consistency, mix cornstarch with cold water and stir into the stew. Cook for an additional 5 minutes. This recipe yields a rich, flavorful stew that showcases the natural taste of venison.
Serve hot with crusty bread for a satisfying meal after a long day outdoors.
Venison Chili
Venison chili offers a hearty and spicy option for canned deer meat. This dish is perfect for cool evenings or gatherings with fellow hunters.
Begin by sautéing onions and garlic in a large pot. Add canned venison and break it apart with a spoon. Stir in diced tomatoes, kidney beans, and tomato paste. Season with chili powder, cumin, and oregano.
Simmer the chili for 30 minutes, allowing flavors to meld. Adjust spices to taste. For added depth, include a dash of cocoa powder or a splash of coffee.
Top with shredded cheese, sour cream, and chopped cilantro before serving. This chili pairs well with cornbread or tortilla chips.
Venison Stroganoff
Venison stroganoff transforms canned deer meat into a creamy, savory dish. This recipe offers a quick and elegant meal option for hunters.
Start by sautéing sliced mushrooms in butter. Add canned venison and heat through. In a separate bowl, mix sour cream, beef broth, and Dijon mustard.
Pour the sauce over the venison and mushrooms. Simmer gently until heated and slightly thickened. Season with salt, pepper, and a pinch of paprika.
Serve over egg noodles or rice. Garnish with chopped parsley for a touch of freshness. This stroganoff provides a delicious way to enjoy canned venison with minimal preparation time.
Conclusion
Canned venison offers hunters a versatile and convenient way to preserve their wild game. This method extends the shelf life of venison while maintaining its nutritional value and flavor.
Hunters can create numerous delicious meals using canned venison. From hearty stews to quick sandwiches, the possibilities are vast. Canned venison recipes often incorporate vegetables and spices, enhancing the meat’s natural taste.
Proper canning techniques ensure food safety and quality. Trimming excess fat, cutting meat into uniform cubes, and following recommended processing times are crucial steps. Sterilized jars and appropriate headspace contribute to successful preservation.
Canned venison frees up freezer space, allowing hunters to store more of their harvest. It also provides a ready-to-use protein source for quick weeknight dinners or camping trips.
Experimenting with different seasonings and ingredients can lead to personalized venison recipes. Whether using a pressure canner or hot water bath method, hunters can enjoy their wild game year-round through effective canning practices.