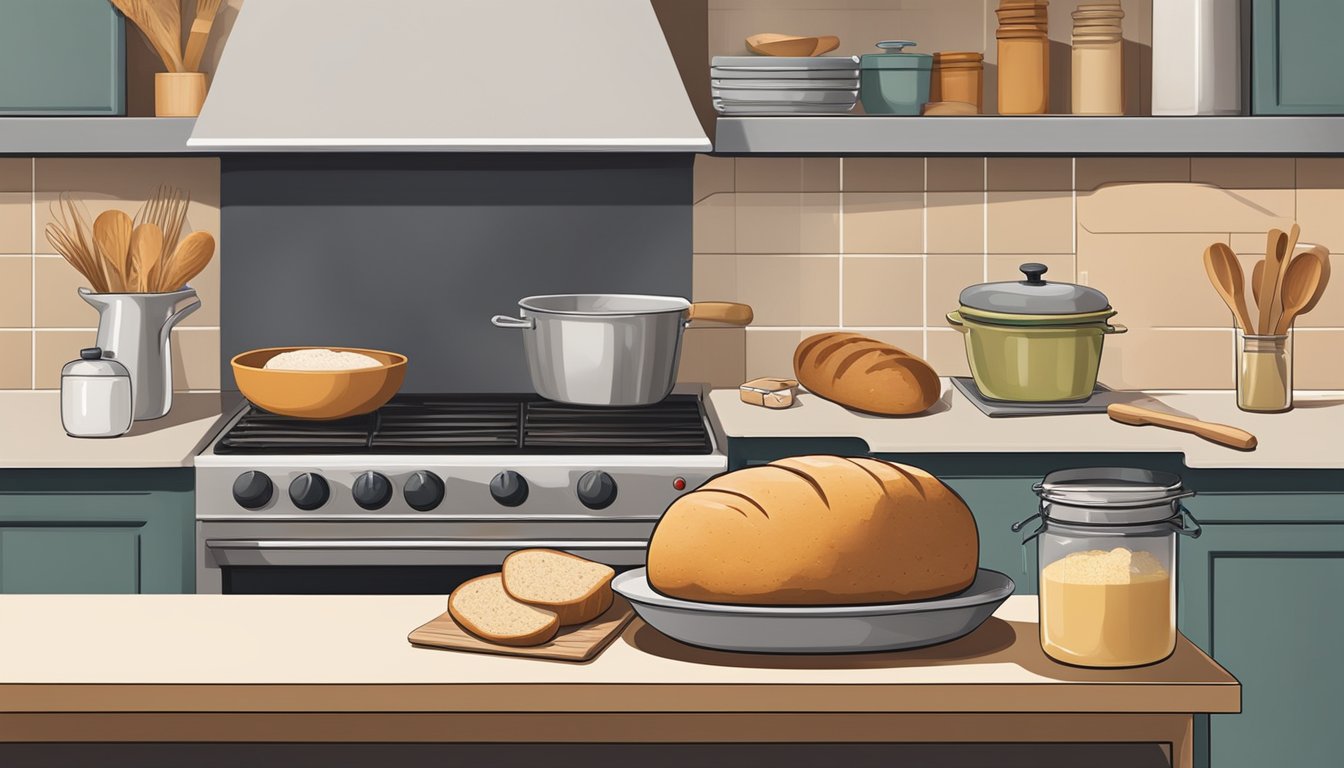
Mastering the art of bread baking is a rewarding journey that enhances culinary skills and fills homes with irresistible aromas. While the process can be time-consuming, it offers opportunities to multitask and prepare other dishes simultaneously. Efficient time management allows bakers to create complete meals while tending to their rising dough.
Bread baking involves several stages with waiting periods, ideal for tackling other kitchen tasks. During the initial mixing and kneading, cooks can prep ingredients for side dishes or main courses. As the dough rests and rises, there’s ample time to chop vegetables, marinate meats, or assemble salads. The final proofing stage provides a perfect window to finish cooking accompanying dishes or set the table.
Integrating bread baking into meal preparation requires planning and organization. Bakers can choose recipes that complement their bread, considering flavors and cooking times. This approach not only maximizes kitchen productivity but also ensures a well-rounded, homemade meal featuring freshly baked bread as the centerpiece.
Essentials of Bread Baking

Mastering bread baking requires understanding key ingredients, developing gluten properly, and harnessing the power of yeast fermentation. These fundamental elements form the foundation for creating delicious homemade bread.
Understanding Key Ingredients
Flour is the cornerstone of bread baking. Bread flour, with its high protein content, is ideal for most loaves. All-purpose flour works well for softer breads. Whole wheat flour adds nutrition and flavor but requires more moisture.
Water activates the gluten in flour and dissolves other ingredients. The temperature matters – warm water (105-110°F) activates yeast effectively.
Salt enhances flavor and controls yeast activity. It strengthens gluten structure too.
Yeast is the leavening agent that makes bread rise. Instant yeast is convenient and mixes directly with dry ingredients. Active dry yeast needs to be dissolved in water first.
The Role of Gluten Development
Gluten is the protein network that gives bread its structure. It forms when flour is mixed with water and kneaded.
Proper kneading develops gluten strands, creating an elastic dough that can trap gas bubbles produced by yeast. This results in a light, airy texture.
The windowpane test checks gluten development. Stretch a small piece of dough – if it forms a thin, translucent “windowpane” without tearing, the gluten is well-developed.
Over-kneading can break down gluten, leading to dense bread. Under-kneading results in a crumbly texture.
Yeast and Fermentation Basics
Yeast consumes sugars in the dough, producing carbon dioxide and ethanol. This process, called fermentation, creates flavor and helps the dough rise.
Temperature affects fermentation rate. Warmer conditions speed up the process, while cooler temperatures slow it down.
Proofing is the final rise before baking. It allows yeast to produce more gas, resulting in a lighter loaf.
Over-proofing leads to collapsed bread, while under-proofing results in dense texture. The dough is ready when it springs back slowly when gently poked.
Scoring the dough before baking allows for controlled expansion in the oven, preventing random cracks and ensuring even rise.
Preparing Your Dough
Proper dough preparation is crucial for creating delicious bread. This process involves carefully combining ingredients, developing gluten, and allowing fermentation to occur.
Mixing and Autolyse
Start by measuring your ingredients accurately. Combine the flour and water in a large bowl, mixing until no dry flour remains. This initial step, called autolyse, allows the flour to hydrate fully. Let the mixture rest for 20-30 minutes.
Add salt and yeast to the dough after the autolyse period. Mix thoroughly to distribute these ingredients evenly. The autolyse process helps jumpstart gluten development and enhances the dough’s extensibility.
For whole grain flours, a longer autolyse of 1-2 hours may be beneficial. This extra time softens the bran and improves overall dough structure.
Kneading Techniques
Kneading develops the gluten network, essential for bread structure. There are several effective methods:
- Hand kneading: Fold and push the dough repeatedly for 10-15 minutes.
- Stand mixer: Use the dough hook attachment on medium speed for 8-10 minutes.
- Stretch and fold: Perform a series of stretches and folds every 30 minutes during bulk fermentation.
Properly kneaded dough should be smooth and elastic. The windowpane test can help determine if sufficient gluten has developed. Stretch a small piece of dough – if it forms a thin, translucent membrane without tearing, it’s ready.
The First Rise: Fermentation Process
After kneading, place the dough in a lightly oiled bowl for bulk fermentation. Cover with a damp cloth or plastic wrap to prevent drying. The ideal temperature for fermentation is around 75-80°F (24-27°C).
During this time, yeast consumes sugars in the flour, producing carbon dioxide and ethanol. This process creates flavor compounds and helps the dough rise.
The first rise typically takes 1-2 hours, depending on room temperature and yeast activity. Look for the dough to roughly double in size. Perform a finger poke test – if an indentation slowly springs back, the dough is ready for shaping.
Some bakers use a longer, cooler fermentation in the refrigerator (12-24 hours) to develop more complex flavors. This method requires planning ahead but can yield excellent results.
Mastering Sourdough
Sourdough bread offers a unique flavor and texture through natural fermentation. This process relies on wild yeasts and bacteria to create a tangy, chewy loaf with a crisp crust.
Creating a Sourdough Starter
To begin your sourdough journey, create a starter by mixing equal parts flour and water. Leave this mixture at room temperature, feeding it daily with fresh flour and water. Within a week, bubbles will form, indicating active fermentation.
The starter develops a complex ecosystem of wild yeasts and lactic acid bacteria. These microorganisms break down flour, producing carbon dioxide and lactic acid. This process gives sourdough its characteristic flavor and leavening power.
For best results, use unbleached flour and filtered water. Maintain a consistent feeding schedule to keep your starter healthy and vigorous.
Maintaining Wild Yeasts and Bacteria
Proper maintenance ensures a thriving sourdough culture. Store your mature starter in the refrigerator between uses. Feed it weekly with equal parts flour and water to keep it active.
Before baking, remove the starter from the refrigerator and feed it 12-24 hours in advance. This “wakes up” the microorganisms and boosts their activity.
Discard a portion of the starter before each feeding to maintain its balance. Use this discard in pancakes, waffles, or other recipes to reduce waste.
Baking Sourdough Bread: From Mixing to Oven
Begin by mixing flour, water, salt, and active starter. Knead the dough until it develops a smooth, elastic texture. Allow the dough to ferment for several hours, performing stretch-and-fold techniques to build strength.
Shape the dough and place it in a proofing basket. Let it rise for 3-4 hours at room temperature or overnight in the refrigerator.
Preheat your oven to 450°F (230°C) with a Dutch oven inside. Score the dough with a sharp knife, then bake it covered for 20 minutes. Remove the lid and continue baking until the crust turns golden brown.
Cool the bread completely before slicing to allow the crumb structure to set. Enjoy your homemade sourdough with its complex flavors and textures.
Shaping, Proofing, and Scoring
Mastering bread shaping, proofing, and scoring techniques is crucial for creating bakery-quality loaves at home. These steps influence the bread’s final texture, appearance, and flavor.
Bread Shaping Techniques
Shaping bread dough is an essential skill that affects the loaf’s structure and appearance. For sandwich loaves, stretch the dough into a rectangle and roll it tightly to fit the pan. Boules require gentle folding and tension-building to create a tight, round shape.
For baguettes or batards, stretch the dough into a circle. Fold the left side to the middle, then the right side over it. Seal the seams and roll to the desired length. A dough scraper helps manipulate sticky dough during shaping.
Practice different techniques to achieve various bread shapes. Proper shaping ensures even rising and a pleasing final product.
Proofing and Its Impact on Bread Quality
Proofing, or allowing the shaped dough to rise, is critical for developing flavor and texture. The first rise, or bulk fermentation, occurs before shaping. It typically takes 1-2 hours, depending on the dough and environment.
After shaping, the second rise or final proof takes place. This step usually lasts 30-60 minutes. Use a proofing basket or bowl to support the dough’s shape during this time.
Proper proofing results in a light, airy crumb and enhanced flavor. Underproofed bread may be dense, while overproofed loaves can collapse during baking.
Test for proper proofing by gently pressing the dough. It should spring back slowly, leaving a slight indentation.
Scoring Dough Before Baking
Scoring bread serves both functional and aesthetic purposes. It guides the dough’s expansion during baking, preventing unpredictable cracks and ensuring optimal rise.
Use a sharp blade or lame to make shallow cuts on the dough’s surface just before baking. For round loaves, a single deep slash or cross-pattern works well. Baguettes benefit from diagonal cuts along their length.
The depth and angle of scores affect the bread’s final appearance. Shallow cuts at a 90-degree angle result in subtle openings, while deeper, angled cuts create dramatic “ears” that lift during baking.
Experiment with different scoring patterns to develop your signature style. Remember that scoring is both a science and an art in bread-making.
The Baking Process
The baking process transforms raw dough into delicious bread through precise temperature control, humidity management, and careful monitoring. Mastering these elements is crucial for achieving consistently excellent results.
Oven Temperature and Humidity
Preheating the oven is essential for proper bread baking. Most bread recipes call for temperatures between 350°F and 450°F (175°C to 230°C). Using an oven thermometer ensures accuracy, as built-in gauges can be unreliable.
Humidity plays a vital role in crust formation and oven spring. To create steam, place a shallow pan of water on the bottom rack or spritz the oven walls with water before inserting the bread.
For crusty breads, maintain high humidity during the first 10-15 minutes of baking, then remove the water source to allow the crust to crisp up.
Monitoring Bread for Perfect Bake
Visual cues help determine when bread is fully baked. Look for a golden-brown crust and a firm texture. Tapping the bottom of the loaf should produce a hollow sound.
For precise results, use a digital thermometer to check the internal temperature. Most breads are done when they reach 190°F to 200°F (88°C to 93°C).
To prevent an overly dark or burnt crust, cover the bread with aluminum foil if it browns too quickly before the inside is fully baked.
Watch for an even rise during baking. If one side rises more than the other, rotate the loaf halfway through the baking time.
Cooling and Storing Your Bread
Allow bread to cool completely on a wire rack before slicing. This process, known as “setting the crumb,” can take 1-2 hours depending on loaf size.
Cutting into hot bread can result in a gummy texture and make it go stale faster. Patience yields better flavor and texture.
Store fully cooled bread in a paper bag or bread box at room temperature for 2-3 days. For longer storage, slice and freeze the bread, then thaw individual pieces as needed.
Avoid refrigerating bread, as this speeds up the staling process. If the crust becomes soft, crisp it up in a 350°F (175°C) oven for 5-10 minutes before serving.
Advanced Baking Techniques
Mastering advanced bread baking techniques can elevate your skills and produce bakery-quality results at home. These methods focus on perfecting kneading, shaping, and troubleshooting common issues.
Making Varieties of Bread
Kneading techniques vary depending on the type of bread. For baguettes, use a gentle folding method to maintain air pockets. English muffins require minimal kneading and are shaped on a griddle before baking.
To achieve an open crumb structure, employ the stretch and fold technique. This involves stretching the dough and folding it over itself at regular intervals during fermentation.
For crusty artisan loaves, use a Dutch oven or baking stone to create steam. This mimics professional ovens and results in a crisp, golden crust.
Experiment with different flour blends and hydration levels to alter texture and flavor. Whole wheat or rye flour can add depth, while higher hydration produces a more open crumb.
Troubleshooting Common Baking Issues
Bread not rising properly often indicates inactive yeast. Test yeast viability before use and ensure water temperature is correct for activation.
Dense, heavy loaves may result from insufficient kneading or proofing. Develop gluten properly through kneading and allow adequate time for proofing.
Uneven texture can be caused by improper shaping. Practice consistent shaping techniques to distribute air bubbles evenly throughout the dough.
Burnt crusts with underbaked centers suggest oven temperature issues. Use an oven thermometer to verify accuracy and adjust baking time or temperature as needed.
Cracked crusts often occur due to insufficient steam during baking. Create steam by placing a pan of water in the oven or misting the loaf before baking.
Equipping Your Home Bakery

Transforming your kitchen into a home bakery requires the right tools and environment. Proper equipment and conditions are essential for consistently producing high-quality bread.
Essential Baking Tools
A well-equipped home bakery starts with a few key items. Invest in a reliable kitchen scale for precise measurements. Accuracy is crucial in bread baking. Purchase mixing bowls in various sizes for different stages of dough preparation.
A sturdy stand mixer with a dough hook attachment saves time and effort when kneading. For hand mixing, a dough whisk helps incorporate ingredients smoothly.
Baking stones or steel sheets create an ideal surface for crispy crusts. Proofing baskets, also called bannetons, give loaves their distinctive shape during the final rise.
A lame, or bread scoring tool, allows for decorative slashes that control expansion during baking. Oven-safe Dutch ovens or cloches trap steam, mimicking professional ovens.
Creating the Right Baking Environment
Temperature and humidity play vital roles in bread making. Use an oven thermometer to ensure accurate baking temperatures. Consistent heat is key for even baking.
Create a warm, draft-free spot for dough to rise. Some bakers use proofing boxes or turned-off ovens with the light on. A hygrometer helps monitor humidity levels.
Proper storage of ingredients is crucial. Keep flour in airtight containers to prevent moisture absorption. Store yeast in the refrigerator to maintain its potency.
Organize your workspace for efficiency. Designate areas for mixing, shaping, and proofing. Easy access to tools and ingredients streamlines the baking process.