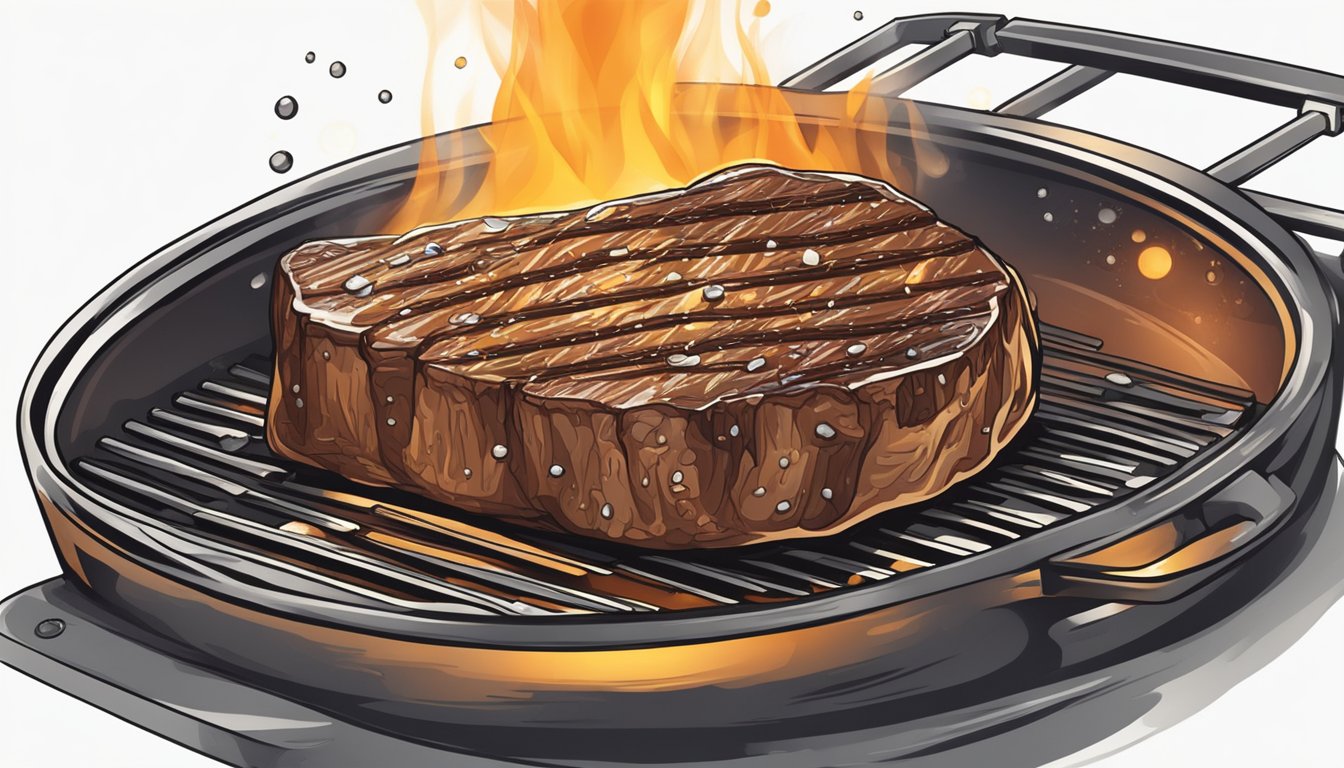
Cooking the perfect steak is an art that combines quality ingredients, proper technique, and attention to detail. A well-prepared steak can rival those served in high-end steakhouses, bringing restaurant-quality flavors right to your dinner table. The key to achieving steak perfection lies in selecting the right cut, mastering the cooking method, and understanding the importance of timing.
Whether pan-searing on the stovetop or grilling outdoors, certain principles apply universally to cooking a great steak. Choosing a high-quality cut of beef, such as ribeye or sirloin, sets the foundation for an exceptional meal. Proper seasoning, typically with just salt and pepper, enhances the natural flavors of the meat without overpowering them.
Temperature control plays a crucial role in cooking steak to the desired doneness. From rare to well-done, each level requires precise timing and heat management. Resting the steak after cooking allows the juices to redistribute, ensuring a moist and flavorful result. With practice and attention to these details, anyone can learn to cook a steak that rivals the best steakhouses.
Choosing the Right Cut of Steak
Selecting the perfect steak involves understanding different cuts and quality grades. The right choice can elevate your meal from good to exceptional.
Understanding Steak Varieties
Ribeye offers rich marbling and intense flavor. It’s ideal for grilling or pan-searing. New York strip, also known as strip steak, provides a good balance of tenderness and flavor.
Filet mignon, cut from the tenderloin, is the most tender but less flavorful. T-bone and porterhouse steaks combine strip and tenderloin for varied textures. Sirloin, particularly top sirloin, is leaner but still flavorful.
Flank, hanger, and skirt steaks are less tender but pack a punch in taste. They’re best for marinades and quick cooking methods. Rump steak, while tougher, offers robust flavor at a lower price point.
Selecting Quality Grade
USDA grades help determine steak quality. Prime grade, the highest, has abundant marbling and is often found at high-end butchers. Choice grade, common in supermarkets, offers good quality with less marbling than Prime.
Select grade is leaner and less tender, suitable for marinades or slow-cooking methods. Look for even distribution of fat throughout the meat. Thickness matters – aim for steaks 1.5 to 2 inches thick for optimal cooking results.
Consider the source. Specialty butchers often provide higher-quality cuts than supermarkets. They can also offer advice on selection and preparation.
Prepping the Steak Before Cooking
Proper preparation is crucial for achieving a perfectly cooked steak. Taking the time to bring the meat to room temperature, deciding on marinade use, and seasoning correctly can significantly enhance flavor and texture.
Bringing Steak to Room Temperature
Remove the steak from the refrigerator 30-60 minutes before cooking. This allows for more even cooking throughout the meat. Place the steak on a plate or cutting board, covered loosely with foil.
Room temperature steaks cook more uniformly, reducing the risk of an overcooked exterior and undercooked interior. This step is especially important for thicker cuts.
For food safety, don’t leave the steak out for more than 2 hours. If the ambient temperature is above 90°F (32°C), limit it to 1 hour.
To Marinate or Not
Marinating can add flavor and tenderness to certain cuts of steak. For tougher cuts like flank or skirt steak, a marinade can help break down muscle fibers.
Use an oil-based marinade with acidic ingredients like vinegar or citrus juice. Add herbs and spices for extra flavor. Marinate for 2-8 hours in the refrigerator.
For high-quality, tender cuts like ribeye or filet mignon, marinating is often unnecessary. These steaks are best enjoyed with simple seasoning to highlight their natural flavors.
Seasoning the Steak
Pat the steak dry with paper towels before seasoning. This ensures a better crust when cooking.
For a classic approach, use kosher salt and freshly ground black pepper. Apply generously to all sides of the steak. Salt draws out moisture, which is reabsorbed, seasoning the meat throughout.
Experiment with other seasonings like garlic powder, onion powder, or dried herbs. For a bolder flavor, try a pre-made steak rub or create your own blend.
Season the steak 30-40 minutes before cooking to allow the salt to penetrate. For a quick meal, season just before cooking.
Selecting the Suitable Cooking Method
The perfect steak begins with choosing the right cooking method. Each technique imparts unique flavors and textures, catering to different preferences and steak cuts.
Grilling Techniques
Grilling creates a smoky flavor and attractive grill marks. Preheat the grill to high heat for thin steaks or medium-high for thicker cuts. Pat the steak dry and season generously.
For a medium-rare result, grill 1-inch thick steaks for 3-4 minutes per side. Use tongs to flip, avoiding puncturing the meat. Let the steak rest for 5 minutes before serving.
Gas grills offer consistent heat, while charcoal imparts a more intense smoky flavor. A two-zone fire allows for searing and gentle cooking.
Pan-Searing Tips
Pan-searing works well for thinner steaks and creates a flavorful crust. Choose a heavy-bottomed skillet, preferably cast-iron, for even heat distribution.
Heat the pan over medium-high heat until very hot. Add a high smoke-point oil like vegetable or grapeseed. Place the seasoned steak in the pan, cooking for 3-4 minutes per side for medium-rare.
Baste with butter and herbs in the last minute for extra flavor. Rest the steak on a warm plate for 5 minutes before slicing.
Oven Roasting Suggestions
Oven roasting suits thick steaks and ensures even cooking. Preheat the oven to 400°F (200°C). Sear the steak in an oven-safe skillet for 3-4 minutes per side.
Transfer the skillet to the oven. Cook for 5-10 minutes, depending on thickness and desired doneness. Use a meat thermometer to check internal temperature.
For reverse searing, start in a low oven (250°F/120°C) until the steak reaches 10-15°F below target temperature. Finish with a quick sear in a hot skillet for a perfect crust.
Mastering the Cooking Process
Achieving steak perfection requires precise temperature control, understanding doneness levels, and using the right tools. These factors are crucial for consistently delivering a juicy, flavorful steak cooked to your exact preferences.
Determining the Right Temperature
Selecting the appropriate cooking temperature is essential for steak preparation. For most cuts, a high heat of 400-450°F (204-232°C) is ideal. This intense heat quickly sears the exterior, creating a flavorful crust while sealing in juices.
Thicker steaks benefit from a two-step cooking process. Start with a high-heat sear, then finish at a lower temperature of 300-350°F (149-177°C) to ensure even cooking throughout.
For lean cuts, a slightly lower temperature of 375-400°F (191-204°C) helps prevent drying out the meat.
Achieving Desired Doneness
Steak doneness levels range from blue to well done. Each level corresponds to a specific internal temperature:
- Blue: 115°F (46°C)
- Rare: 125°F (52°C)
- Medium Rare: 135°F (57°C)
- Medium: 145°F (63°C)
- Medium Well: 150°F (66°C)
- Well Done: 160°F (71°C)
Cooking times vary based on thickness and desired doneness. A 1-inch thick steak typically requires 3-4 minutes per side for medium rare.
Remember that carryover cooking occurs after removing the steak from heat. The internal temperature can rise an additional 5°F (3°C).
Utilizing a Meat Thermometer
A meat thermometer is invaluable for achieving precise doneness. Insert it horizontally into the thickest part of the steak, avoiding fat or bone.
For accurate readings, avoid touching the thermometer to the cooking surface or pushing it through to the other side of the steak.
Digital instant-read thermometers offer quick, precise measurements. Some models feature programmable alerts for specific temperature targets.
Regularly check the steak’s temperature, especially as it nears the desired doneness. This helps prevent overcooking and ensures a juicy result.
Enhancing Flavor and Texture
Elevating a steak’s taste and mouthfeel involves several key techniques. These methods focus on creating a flavorful exterior, infusing fats, adding aromatic elements, and finishing with complementary sauces.
Creating a Crust
A well-developed crust is crucial for a perfect steak. To achieve this, ensure the cooking surface is extremely hot before adding the meat. Cast iron skillets or grills work well for this purpose. Pat the steak dry with paper towels to remove excess moisture, which can inhibit crust formation. Season generously with salt and pepper just before cooking.
For an optimal crust, sear the steak for 3-4 minutes on each side without moving it. This allows the Maillard reaction to occur, creating complex flavors and a golden-brown exterior. Flip only once to maintain an even crust.
Some chefs recommend basting the steak with butter during the final minutes of cooking. This technique helps develop a rich, caramelized crust while adding flavor.
Adding Fats and Oils
Fats play a crucial role in enhancing a steak’s flavor and juiciness. Start by choosing a cut with good marbling, as intramuscular fat contributes to tenderness and taste.
Before cooking, brush the steak lightly with a high smoke-point oil like grapeseed or avocado oil. This helps prevent sticking and promotes even browning.
During cooking, consider adding butter to the pan. As it melts, spoon it over the steak to baste it. This process, known as arroser, infuses the meat with rich, nutty flavors.
For a luxurious finish, top the cooked steak with a pat of compound butter. Mix softened butter with herbs, garlic, or blue cheese for added complexity.
Incorporating Aromatics and Herbs
Aromatics and herbs can elevate a steak’s flavor profile. Add whole garlic cloves and hardy herbs like rosemary or thyme to the pan while cooking. These ingredients infuse the oil or butter with their essence, which then transfers to the steak.
For a more intense flavor, create an herb brush. Tie together sprigs of rosemary and thyme, then use this to baste the steak with melted butter or oil during cooking.
Consider rubbing the steak with crushed garlic or a spice blend before cooking. This creates a flavorful crust and adds depth to the overall taste.
After cooking, let the steak rest on a bed of fresh herbs. The residual heat will release the herbs’ oils, gently flavoring the meat.
Sauce and Butter Finishes
A well-crafted sauce can complement and enhance a steak’s natural flavors. Classic options include peppercorn, mushroom, or béarnaise sauces.
To make a simple pan sauce, deglaze the skillet with red wine or beef stock after cooking the steak. Scrape up the flavorful bits from the bottom of the pan, then reduce the liquid. Finish with a pat of cold butter for richness and glossiness.
Compound butters offer another delicious finish. Mix softened butter with ingredients like blue cheese, herbs, or roasted garlic. Place a slice on the hot steak just before serving.
For a lighter option, consider a chimichurri sauce. This herb-based condiment adds freshness and acidity to balance the steak’s richness.
Resting the Steak
Resting is a crucial step in achieving a perfectly cooked steak. After removing the steak from heat, allow it to rest for 5-10 minutes before cutting or serving.
During the resting period, the internal temperature of the steak continues to rise slightly. This process, known as carryover cooking, helps finish the steak to the desired doneness.
Resting allows the juices to redistribute throughout the meat. This results in a more flavorful and juicy steak when cut. Without proper resting, the juices may run out onto the plate, leaving the steak dry.
To rest a steak:
- Place it on a cutting board or warm plate
- Loosely tent with aluminum foil to retain heat
- Let it sit undisturbed for the allotted time
The ideal resting temperature is between 120°F and 125°F. At this range, the muscle fibers relax, allowing juices to be reabsorbed.
Resting times vary based on steak thickness:
| Thickness | Rest Time |
|---|---|
| 1 inch | 5 minutes |
| 1.5 inches | 7 minutes |
| 2 inches | 10 minutes |
After resting, the steak is ready to be sliced and served. This simple step ensures a juicy, flavorful result.
Serving the Steak
Proper serving techniques enhance the steak-eating experience. Slicing and presenting the meat correctly maximizes flavor and texture. Thoughtful accompaniments complement the steak’s rich flavors.
Slicing Techniques
After resting, slice the steak against the grain. This cuts through muscle fibers, ensuring maximum tenderness. Use a sharp knife and cut at a slight angle for wider, more appealing slices.
For thicker cuts like ribeye or New York strip, aim for 1/4 to 1/2 inch thick slices. Thinner cuts like flank or skirt steak benefit from very thin slices, about 1/8 inch thick.
Fan the slices on a warm plate for an attractive presentation. Leave some slices slightly overlapping to help retain heat.
Accompaniments and Pairings
Choose side dishes that complement the steak’s richness. Roasted vegetables like asparagus, Brussels sprouts, or carrots offer a nice contrast in texture and flavor.
Creamy mashed potatoes or a crisp salad balance the meal. For wine pairings, bold reds like Cabernet Sauvignon or Malbec stand up well to beef’s strong flavors.
Consider classic steak sauces:
- Béarnaise
- Peppercorn
- Chimichurri
- Garlic butter
A compound butter melting over the hot steak adds extra richness. Experiment with blue cheese crumbles or sautéed mushrooms as toppings.
Storing Leftovers and Food Safety
Proper storage of leftover steak is crucial for maintaining its quality and ensuring food safety. After cooking, allow the steak to cool to room temperature for no more than two hours.
Wrap the cooled steak tightly in aluminum foil or plastic wrap to prevent air exposure. This helps retain moisture and prevents the meat from drying out in the fridge.
Place the wrapped steak in an airtight container or heavy-duty freezer bag. Remove as much air as possible before sealing to further protect against freezer burn.
Store leftovers in the rear end of the fridge, where temperatures are most consistent. Cooked steak can be safely refrigerated for 3-4 days.
For longer storage, freeze the steak. Wrap individual portions in freezer paper, then place in freezer bags. Frozen steak can last up to 3 months.
When reheating, ensure the internal temperature reaches 165°F (74°C) to kill any potential bacteria. Use a food thermometer to check.
Discard any steak left at room temperature for more than 2 hours, or 1 hour if the temperature is above 90°F (32°C).
Remember, proper packaging and storage temperatures are key to maintaining both taste and safety of leftover steak.