Tri-tip, a flavorful cut of beef from the bottom sirloin, is prized for its rich taste and tender texture when cooked properly. While often grilled, oven-roasted tri-tip offers a convenient and delicious alternative, especially when outdoor cooking isn’t an option. The key to perfect oven-roasted tri-tip lies in seasoning the meat well, searing it to lock in juices, and cooking it to the desired doneness using a reliable meat thermometer.
This versatile cut can be seasoned simply with salt and pepper or elevated with a blend of spices and herbs. Cooking tri-tip in the oven typically involves a two-step process: searing on the stovetop to create a flavorful crust, then finishing in the oven until it reaches the desired internal temperature. For medium-rare, aim for 130-135°F (54-57°C), which usually takes about 20-30 minutes in a preheated oven at 425°F (218°C).
Understanding Tri-Tip
Tri-tip is a flavorful and versatile cut of beef that offers excellent value. This triangular-shaped roast comes from the bottom sirloin and has unique characteristics that make it ideal for oven roasting.
What Is Tri-Tip
Tri-tip is a lean, boneless cut of beef from the bottom sirloin subprimal. It gets its name from its triangular shape. Also known as the California cut, tri-tip typically weighs between 1.5 to 2.5 pounds.
The meat has a rich, beefy flavor and tender texture when cooked properly. Tri-tip contains some marbling throughout, which contributes to its juiciness and taste.
A thin layer of fat, called the fat cap, often covers one side of the roast. Some cuts may also have a tough connective tissue known as silver skin.
Selecting the Best Tri-Tip
When choosing tri-tip, look for cuts with even marbling throughout the meat. This intramuscular fat enhances flavor and juiciness.
Opt for bright red meat with a firm texture. Avoid cuts with excessive surface fat or large fatty deposits.
Tri-tip is available in two forms:
- Trimmed: Fat cap and silver skin removed
- Untrimmed: Fat cap intact, may have silver skin
Trimmed tri-tip is more convenient but may dry out faster during cooking. Untrimmed offers more flavor but requires additional preparation.
Preparation Essentials
Proper preparation is key to achieving a delicious oven-roasted tri-tip. Start by bringing the meat to room temperature for even cooking.
If using an untrimmed cut, remove the tough silver skin. Trim excess fat, leaving about 1/4 inch of the fat cap for flavor and moisture.
Season the tri-tip generously with salt and pepper or your preferred spice rub. Allow the seasoned meat to rest for 30 minutes before cooking.
For enhanced tenderness, consider marinating the tri-tip for 2-4 hours. Use acidic ingredients like vinegar or citrus juice to break down muscle fibers.
Required Cooking Tools

Proper equipment is essential for achieving a perfectly roasted tri-tip. The right tools ensure even cooking and accurate temperature monitoring.
Best Cookware for Oven Roasting
A heavy-duty roasting pan is ideal for cooking tri-tip in the oven. It provides even heat distribution and can withstand high temperatures. Alternatively, a cast iron skillet works well for smaller cuts.
Line the pan with aluminum foil for easier cleanup. This also helps retain moisture during cooking.
For larger tri-tips, a rack inside the roasting pan elevates the meat, allowing hot air to circulate underneath. This promotes more even cooking and a better crust.
Measuring Internal Temperature
An instant-read thermometer is crucial for achieving the desired doneness. Insert it into the thickest part of the meat to get an accurate reading.
For continuous monitoring, use a leave-in meat thermometer with an external display. This allows you to track the temperature without opening the oven door.
Digital thermometers offer quick, precise readings. Many models have preset temperatures for different levels of doneness, making it easy to achieve perfect results.
Always calibrate your thermometer regularly to ensure accuracy. This is especially important for achieving consistent results with tri-tip roasts.
Seasoning the Tri-Tip

Proper seasoning is crucial for enhancing the flavor of tri-tip. A well-seasoned tri-tip can elevate the dining experience, bringing out the meat’s natural flavors and adding complementary tastes.
Dry Rubs and Marinades
Dry rubs are an excellent choice for tri-tip seasoning. A basic rub can be made with kosher salt, black pepper, and garlic powder. For more complex flavors, smoked paprika, cumin, and cayenne pepper can be added. Apply the rub generously, massaging it into the meat’s surface.
Marinades offer another tasty option. A simple marinade might include olive oil, minced garlic, and chopped rosemary. For best results, marinate the tri-tip for 4-12 hours in the refrigerator. This allows the flavors to penetrate the meat.
The Santa Maria rub, a classic for tri-tip, typically consists of salt, black pepper, and garlic powder. Some variations include dried rosemary or other herbs for added complexity.
Herbs and Spices for Flavor Enhancement
Fresh herbs can significantly boost tri-tip’s flavor profile. Rosemary and thyme are popular choices that complement beef well. Finely chop fresh rosemary and sprinkle it over the meat before cooking.
Garlic is a staple in tri-tip seasoning. Use minced fresh garlic for a more pungent flavor, or garlic powder for even distribution. Black pepper adds a necessary bite to the seasoning blend.
For those who enjoy heat, cayenne pepper or red pepper flakes can be incorporated into the seasoning mix. Smoked paprika imparts a subtle smokiness that enhances the meat’s flavor.
Experiment with different spice combinations to find your preferred flavor profile. Remember to season the tri-tip at least 30 minutes before cooking to allow the flavors to penetrate the meat.
The Cooking Process
Mastering tri-tip in the oven requires attention to technique, timing, and temperature. Proper execution ensures a flavorful and tender result.
Oven Roasting Technique
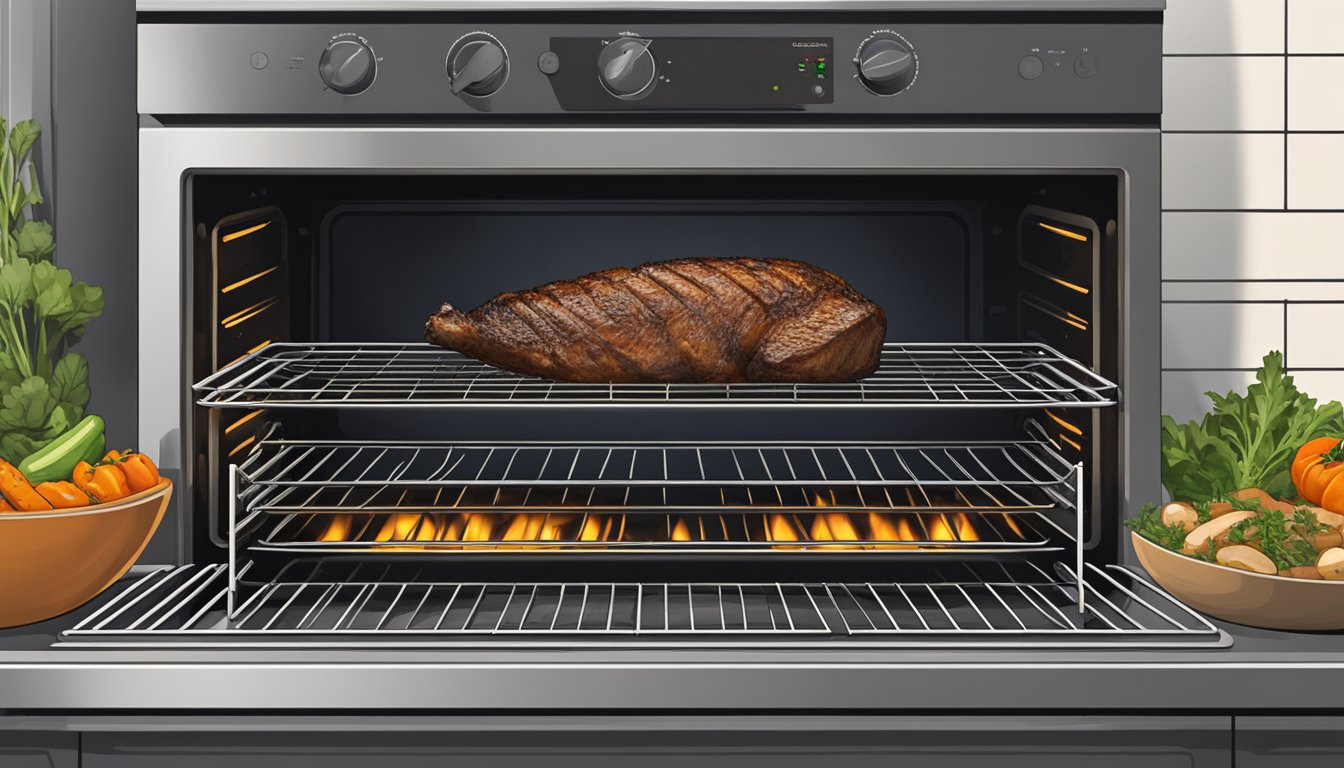
Preheat the oven to 425°F (220°C). Place the seasoned tri-tip on a rack in a shallow roasting pan. This allows hot air to circulate around the meat, promoting even cooking.
Insert an oven-safe meat thermometer into the thickest part of the roast. This will help monitor the internal temperature without opening the oven door.
Roast the tri-tip for about 20-30 minutes. Then, reduce the oven temperature to 350°F (175°C) to finish cooking. This two-step process creates a nicely browned exterior while maintaining a juicy interior.
Determining the Right Cooking Time
Cooking time varies based on the size of the tri-tip and desired doneness. A general rule is 10-15 minutes per pound for medium-rare.
For a 2-pound roast:
- Rare: 20-25 minutes
- Medium-rare: 25-30 minutes
- Medium: 30-35 minutes
Remember, these times are approximate. Always use a meat thermometer for accuracy.
Monitoring for Desired Doneness
Internal temperature is the most reliable indicator of doneness. Use this guide:
- Rare: 125°F (52°C)
- Medium-rare: 135°F (57°C)
- Medium: 145°F (63°C)
- Well-done: 160°F (71°C)
Remove the tri-tip from the oven when it’s 5-10°F below the target temperature. The meat will continue cooking during the resting period.
Let the roast rest for 10-15 minutes before slicing. This allows juices to redistribute, ensuring a moist and flavorful result.
After Cooking: Resting and Slicing
Proper resting and slicing techniques are crucial for maximizing the flavor and juiciness of your oven-cooked tri-tip. These final steps ensure the meat retains its moisture and remains tender when served.
Importance of Resting Time
After removing the tri-tip from the oven, allow it to rest for 10 minutes. This resting period is essential for redistributing the juices throughout the meat. During cooking, heat pushes moisture towards the center of the roast. Resting allows this moisture to spread back out, resulting in a juicier and more flavorful tri-tip.
Place the cooked tri-tip on a cutting board and tent it loosely with aluminum foil. This helps retain heat while allowing excess steam to escape. The internal temperature will continue to rise slightly during this time, completing the cooking process.
Achieving the Perfect Slice
Slicing technique greatly impacts the texture of the tri-tip. Always slice against the grain to ensure maximum tenderness. The grain refers to the direction of the muscle fibers in the meat.
To identify the grain, look for parallel lines running across the surface of the tri-tip. Position your knife perpendicular to these lines. Cut thin slices, about 1/4 inch thick, at a slight angle. This method shortens the muscle fibers, making each bite easier to chew.
Use a sharp knife for clean cuts. A serrated knife can tear the meat fibers, potentially affecting texture. For best results, slice only what you plan to serve immediately, keeping the rest of the roast intact to maintain moisture.
Serving the Tri-Tip
After cooking your tri-tip to perfection, serving it properly enhances the dining experience. Proper presentation and accompaniments can elevate this flavorful cut of beef.
Accompaniments and Side Dishes
Tri-tip pairs well with a variety of side dishes. Roasted vegetables like asparagus, Brussels sprouts, or carrots complement the beef’s rich flavor. Creamy mashed potatoes or crispy roasted potatoes make excellent starchy sides.
A fresh green salad with a light vinaigrette adds a refreshing contrast. Grilled corn on the cob or sautéed mushrooms offer additional tasty options. For a complete meal, consider serving crusty bread or dinner rolls to soak up the meat’s juices.
Don’t forget about sauces. A chimichurri sauce or horseradish cream can add an extra layer of flavor to the tri-tip.
Creative Ways to Serve Leftovers
Leftover tri-tip is versatile and can be transformed into new meals. Thinly sliced tri-tip makes excellent sandwiches when paired with crusty bread, arugula, and a spread of horseradish mayo.
Diced tri-tip can be used in tacos or burritos, topped with fresh salsa and avocado. It’s also a great addition to salads, adding protein and flavor to a bed of mixed greens.
For a hearty breakfast, consider serving tri-tip with eggs and potatoes in a savory hash. Leftover tri-tip can also be incorporated into stir-fries or pasta dishes for quick and satisfying meals.
Storing and Reheating Tips
Proper storage and reheating techniques are crucial for maintaining the quality and safety of leftover tri-tip. These methods help preserve flavor and texture while preventing foodborne illness.
Preserving Freshness
Store leftover tri-tip in an airtight container within two hours of cooking. Place it in the refrigerator, where it will stay fresh for 3-4 days. For longer storage, wrap the meat tightly in aluminum foil or plastic wrap, then place it in a freezer bag. Remove as much air as possible before sealing.
Frozen tri-tip can last up to 3 months without significant quality loss. Label the package with the date to track storage time. When ready to use, thaw frozen tri-tip in the refrigerator overnight.
For best results, slice the tri-tip before storing. This makes portioning and reheating easier later.
Reheating Without Losing Quality
To reheat tri-tip while maintaining its juiciness, use low, slow heat. Preheat the oven to 250°F (120°C). Place the sliced tri-tip in a baking dish and add a splash of beef broth or water to create moisture.
Cover the dish tightly with aluminum foil. Heat for 15-20 minutes or until the internal temperature reaches 165°F (74°C). This method helps preserve the meat’s texture and flavor.
For a quicker option, use a microwave. Place slices on a microwave-safe plate, cover with a damp paper towel, and heat in 30-second intervals until warm. Be cautious not to overcook, as this can lead to dry, tough meat.
To restore the flavorful crust, briefly sear the reheated slices in a hot skillet for 30 seconds per side.