Tri-tip is a flavorful and versatile cut of beef that can be cooked using various methods. This triangular-shaped roast comes from the bottom sirloin and offers a rich, beefy taste. To cook tri-tip, season it with a simple spice rub, then roast it in the oven at a low temperature until it reaches your desired doneness.
For those who prefer outdoor cooking, grilling tri-tip is another excellent option. The meat can be seared over high heat to develop a crispy crust, then finished over indirect heat for even cooking. Alternatively, smoking tri-tip imparts a delicious smoky flavor and results in tender, juicy meat.
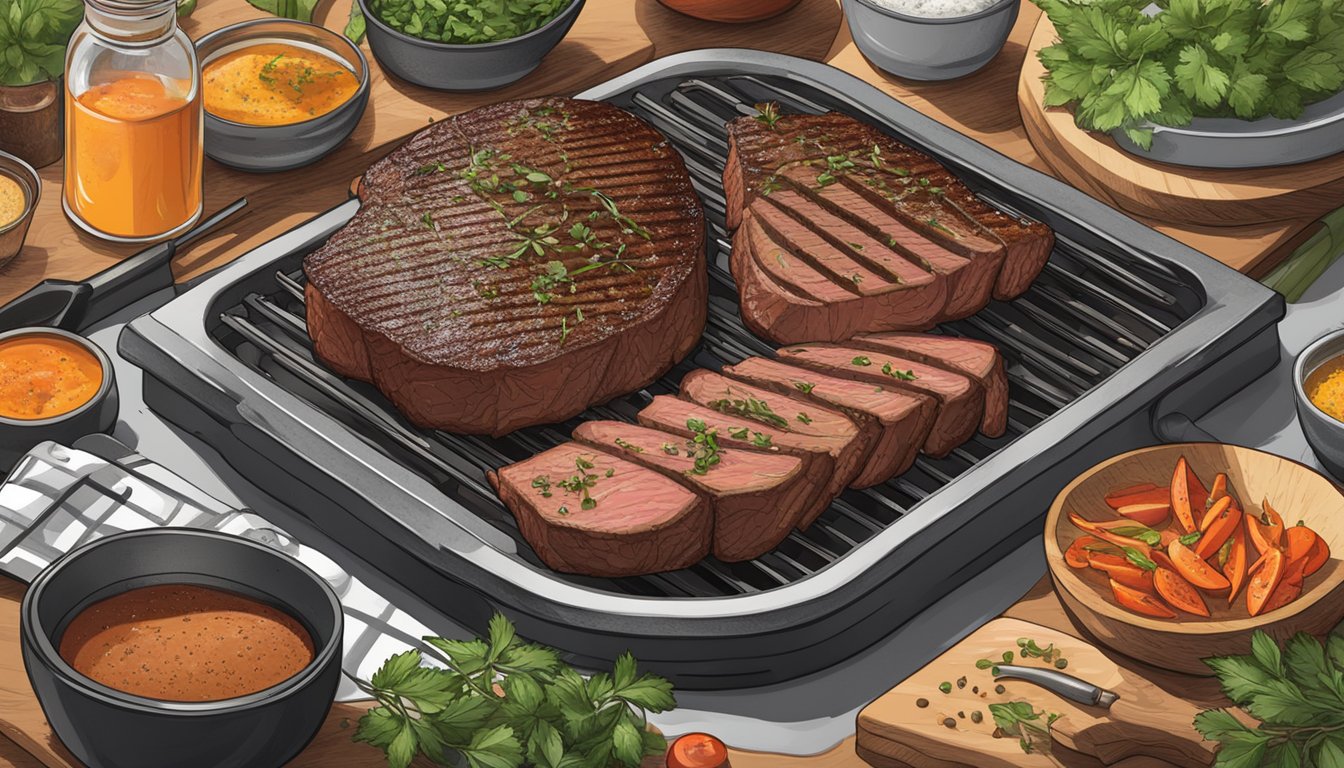
Regardless of the cooking method chosen, it’s crucial to let the tri-tip rest before slicing. This allows the juices to redistribute throughout the meat, ensuring a moist and flavorful result. When sliced against the grain, tri-tip provides tender, bite-sized pieces perfect for serving with a variety of side dishes.
Understanding Tri-Tip
Tri-tip is a flavorful, triangular cut of beef from the bottom sirloin subprimal. It offers a balance of tenderness and rich taste, making it popular for grilling and roasting.
Tri-Tip Basics
Tri-tip is a boneless cut that typically weighs between 1.5 to 2.5 pounds. Its unique triangular shape gives it the name “tri-tip.” This cut has a good amount of marbling, which contributes to its juiciness and flavor.
Tri-tip has two distinct grain directions, which is important to consider when slicing. The meat is relatively lean compared to other beef cuts, but still tender when cooked properly.
It’s versatile and can be prepared using various cooking methods, including grilling, roasting, and smoking.
History and Origins
Tri-tip gained popularity in California during the 1950s. It was previously often ground into hamburger meat or cut into steaks.
The cut became known as “Santa Maria steak” after the city in California where it was first popularized. Local butchers began marketing it as a standalone cut, and it quickly gained favor for its affordability and flavor.
Tri-tip’s popularity spread throughout the western United States and has since become available nationwide. It remains a staple of California barbecue cuisine.
Selecting Quality Meat
When choosing tri-tip, look for meat with a bright red color and visible marbling. The fat should be white or creamy, not yellow.
Select a cut that’s at least 1 inch thick to ensure even cooking. Fresh tri-tip should have a firm texture and no strong odors.
Consider the grade of beef:
- Choice grade offers good marbling and flavor
- Prime grade has superior marbling but is less common and more expensive
For optimal tenderness, choose meat that has been aged for at least 14 days. If possible, opt for grass-fed or organic beef for enhanced flavor and nutritional benefits.
Preparation Before Cooking
Proper preparation is crucial for achieving a delicious tri-tip roast. Key steps include trimming excess fat, marinating to enhance flavor, and seasoning the meat effectively. These techniques lay the foundation for a tender and flavorful result.
Trimming the Meat
Start by examining the tri-tip roast for any excess fat. Using a sharp knife, trim off the silver skin and any thick layers of fat. Leave a thin layer of fat, about 1/4 inch, to help keep the meat moist during cooking.
Remove any loose pieces or ragged edges to ensure even cooking. A well-trimmed tri-tip will cook more uniformly and absorb marinades and seasonings better.
For optimal results, trim the meat while it’s still cold from the refrigerator. This makes the fat firmer and easier to cut cleanly.
Marinating Basics
Marinating can add depth of flavor and help tenderize the tri-tip. Choose a marinade with acidic ingredients like vinegar, citrus juice, or wine to break down tough fibers.
Mix the marinade in a non-reactive container. Place the trimmed tri-tip in the marinade, ensuring it’s fully coated. Refrigerate for 4-12 hours, turning occasionally for even distribution.
For a quick option, use a vacuum sealer to marinate in just 30-60 minutes. Avoid marinating for more than 24 hours, as this can make the meat mushy.
Pat the meat dry with paper towels before cooking to promote better browning.
Seasoning Techniques
If not marinating, seasoning is essential for a flavorful tri-tip. Start with a base of kosher salt and freshly ground black pepper. Apply seasoning generously to all sides of the meat.
Popular additions include:
- Garlic powder
- Smoked paprika
- Dried herbs (rosemary, thyme, oregano)
- Onion powder
- Cayenne for heat
For a simple dry rub, mix equal parts salt, pepper, and garlic powder. Rub the seasoning into the meat at least 30 minutes before cooking to allow flavors to penetrate.
Consider using a spice grinder for whole spices to maximize freshness and flavor intensity.
Cooking Methods
Tri-tip can be prepared using various cooking methods, each offering unique flavors and textures. The key is achieving a perfect balance of tenderness and flavor.
Oven Roasting
Oven roasting is a reliable method for cooking tri-tip. Preheat the oven to 425°F (220°C). Season the meat generously with salt, pepper, and desired herbs or spices.
Place the tri-tip in a roasting pan and cook for about 20-30 minutes. Use a meat thermometer to check for doneness. For medium-rare, aim for an internal temperature of 135°F (57°C).
Let the meat rest for 10 minutes before slicing. This allows the juices to redistribute, ensuring a juicy and flavorful result.
Grilling
Grilling imparts a smoky flavor to tri-tip. Preheat the grill to medium-high heat. Season the meat and place it on the grill.
For a 1½- to 2-pound tri-tip, grill for 35-40 minutes for medium-rare. Flip the meat halfway through cooking for even browning.
Use a meat thermometer to check the internal temperature. Remove the tri-tip from the grill at 135°F (57°C) for medium-rare.
Cover the meat with foil and let it rest for 15 minutes before slicing against the grain.
Pan-Searing
Pan-searing creates a flavorful crust on the tri-tip. Heat a heavy skillet over medium-high heat. Season the meat and add it to the hot pan.
Sear each side for 3-4 minutes to develop a brown crust. Transfer the skillet to a preheated 425°F (220°C) oven.
Roast for 10-15 minutes or until the internal temperature reaches 135°F (57°C) for medium-rare. Let the meat rest for 10 minutes before slicing.
For added flavor, deglaze the pan with beef broth and use the resulting sauce to serve with the tri-tip.
Cooking The Tri-Tip
Proper cooking techniques ensure a tender and flavorful tri-tip roast. Following the right steps for cook time, temperature monitoring, and resting are crucial for achieving the best results.
Determining Cook Time
Cook time for tri-tip varies based on weight and desired doneness. For a 1.5 to 2-pound roast, plan on 35 to 45 minutes of cooking time.
Medium-rare (135°F) typically takes 35 to 40 minutes, while medium (150°F) requires 40 to 45 minutes. Adjust these times for larger or smaller cuts.
Oven roasting at 425°F (220°C) is a popular method. Sear the tri-tip in a hot skillet first, then transfer to the oven to finish cooking.
For slow cooking, set the oven to 225°F (110°C) and extend the cooking time accordingly. This method can result in a more tender roast.
Monitoring Temperature
Using a meat thermometer is essential for achieving the perfect doneness. Insert it into the thickest part of the roast for accurate readings.
For medium-rare, aim for an internal temperature of 125°F (52°C). The temperature will continue to rise during resting.
Check the temperature frequently as the estimated cook time approaches. This prevents overcooking and ensures the desired level of doneness.
For oven roasting, consider using an oven-safe probe thermometer. This allows constant monitoring without opening the oven door repeatedly.
Resting the Meat
Resting is crucial for redistributing juices throughout the meat. Allow the tri-tip to rest for 10 to 15 minutes after cooking.
Place the roast on a cutting board and tent it loosely with aluminum foil. This helps retain heat while allowing excess steam to escape.
During resting, the internal temperature will rise by about 5°F (3°C). Factor this into your final temperature calculations.
Avoid cutting into the meat immediately after cooking. Resting ensures that the juices stay in the meat, resulting in a more flavorful and tender roast.
Perfecting The Serve
Serving tri-tip properly ensures the best dining experience. Proper slicing technique and well-chosen side dishes elevate this flavorful cut of beef.
Slicing the Tri-Tip
Always slice tri-tip against the grain for maximum tenderness. Let the meat rest for 10-15 minutes after cooking to allow juices to redistribute.
Identify the grain direction before cutting. The grain typically changes direction in tri-tip, so adjust your slicing angle accordingly.
Use a sharp knife to create thin, even slices, about 1/4 to 1/2 inch thick. This thickness balances texture and flavor.
Present the slices on a warm platter to maintain temperature. Arrange them in a fan pattern for an appealing visual effect.
Side Dishes and Pairings
Complement tri-tip with sides that balance its rich flavor. Roasted vegetables like asparagus, bell peppers, or zucchini add color and nutrition.
Starchy sides such as garlic mashed potatoes or roasted fingerling potatoes provide satisfying contrasts in texture.
For a lighter option, serve a crisp green salad with a tangy vinaigrette. The acidity cuts through the meat’s richness.
Bread choices include crusty sourdough or soft dinner rolls for soaking up juices.
Wine pairings: opt for bold reds like Cabernet Sauvignon or Zinfandel. For beer enthusiasts, amber ales or brown ales work well.
Consider offering a herb-infused butter or chimichurri sauce as a flavor-enhancing condiment.
After the Meal

Proper handling of leftovers and creative reuse of excess tri-tip can extend your enjoyment of this delicious cut of beef. Storing and repurposing leftover tri-tip ensures nothing goes to waste while providing quick and tasty meal options.
Handling Leftovers
Store leftover tri-tip in an airtight container in the refrigerator within 2 hours of cooking. Properly stored, it will keep for 3-4 days. For longer storage, freeze tri-tip in freezer-safe bags or containers for up to 3 months.
When reheating, slice the meat thinly against the grain to prevent toughness. Warm gently in a skillet with a splash of beef broth, or microwave in short intervals to avoid overcooking.
For best flavor and texture, serve reheated tri-tip at room temperature or just slightly warm. This helps maintain its juiciness and tenderness.
Creative Recipes With Leftovers
Transform leftover tri-tip into new meals to keep things interesting. Slice it thin for sandwiches or wraps, or dice it for use in salads, tacos, or quesadillas.
Try these quick ideas:
- Tri-tip steak salad with mixed greens and a tangy vinaigrette
- Beef and vegetable stir-fry using bite-sized tri-tip pieces
- Tri-tip breakfast hash with potatoes and eggs
For a hearty option, use chopped tri-tip in beef stew or chili. The meat’s rich flavor enhances these dishes beautifully.
Tri-tip also works well in pasta dishes. Toss it with fettuccine, mushrooms, and a creamy sauce for a satisfying meal.