Cooking mouthwatering ribs on a gas grill is an achievable culinary feat that can elevate your barbecue game. The key to perfect ribs lies in slow cooking at a low temperature, typically around 225°F, for several hours to achieve tender, juicy meat that falls off the bone. This method allows the connective tissues to break down gradually, resulting in succulent ribs with a delicious smoky flavor.
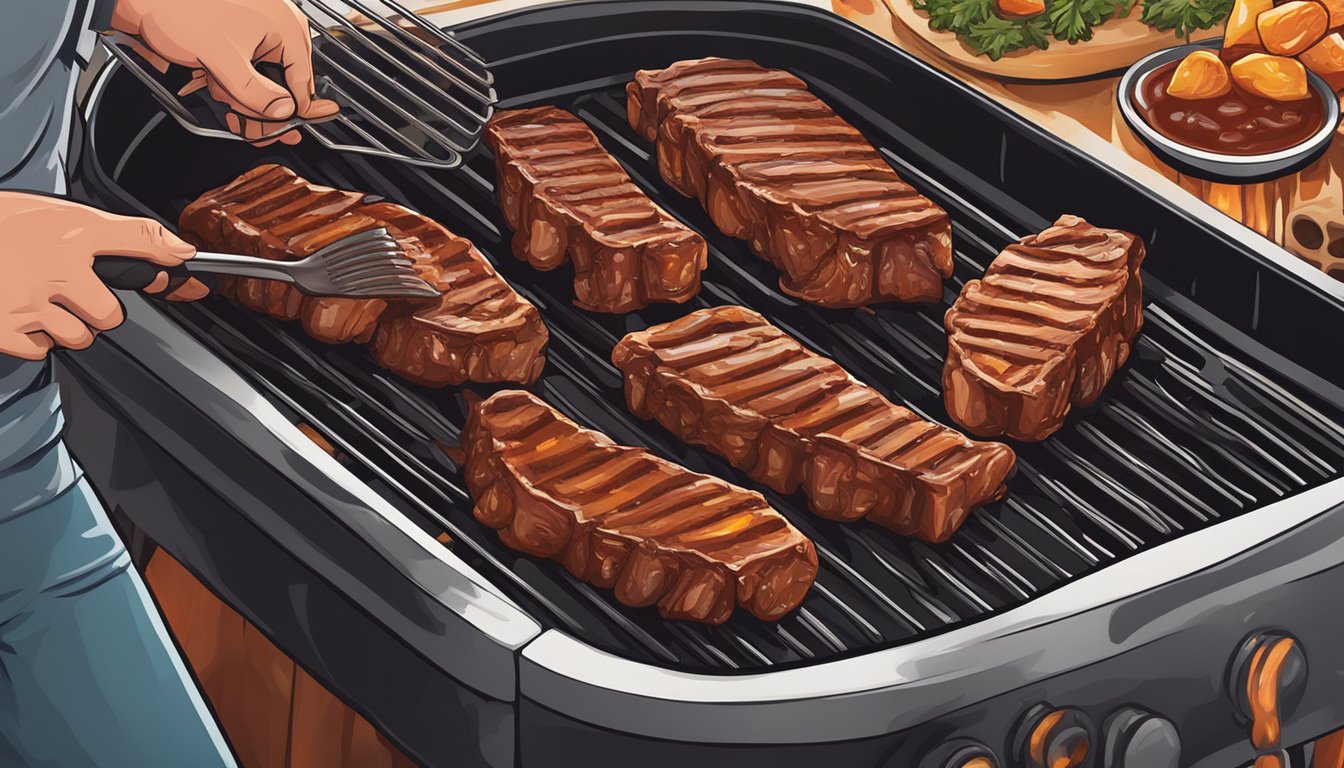
Proper preparation is crucial for grilling ribs to perfection. Start by removing the membrane from the back of the ribs and applying a dry rub or marinade to enhance the flavor. Place the seasoned ribs on a clean, oiled grill grate, ensuring there’s space between each rib for even cooking. Close the lid and let the magic happen, turning the ribs occasionally for uniform cooking.
For those seeking to master the art of grilling ribs, patience is essential. The process may take 2-4 hours depending on the size and type of ribs, but the end result is well worth the wait. Gas grills offer precise temperature control, making them ideal for maintaining the low and slow cooking environment necessary for creating mouthwatering ribs that will impress family and friends at your next cookout.
Selecting the Right Type of Ribs
Choosing the appropriate rib cut is crucial for achieving mouthwatering results on your gas grill. Different types of ribs offer unique flavors, textures, and cooking characteristics.
Baby Back Ribs vs. Spare Ribs
Baby back ribs come from the upper part of the pig’s rib cage, near the loin. They are shorter, more curved, and typically leaner than spare ribs. Baby backs are known for their tender meat and quick cooking time.
Spare ribs are cut from the lower portion of the rib cage. They are larger, flatter, and contain more fat than baby backs. This extra fat contributes to a richer flavor and helps keep the meat moist during longer cooking times.
When selecting between the two, consider cooking time and desired flavor profile. Baby backs are ideal for quicker grilling sessions, while spare ribs shine in low-and-slow cooking methods.
Understanding Cuts: St. Louis-Style Ribs
St. Louis-style ribs are a specific cut of spare ribs. This preparation involves trimming the rib tips, sternum bone, and cartilage to create a more uniform, rectangular shape.
St. Louis-style ribs offer a balanced meat-to-fat ratio and are easier to cook evenly due to their uniform shape. They are ideal for those who enjoy a meatier rib with a good amount of fat marbling.
This cut is particularly well-suited for gas grilling, as the consistent shape allows for even heat distribution. St. Louis-style ribs also take well to dry rubs and glazes, making them a versatile choice for various barbecue styles.
Preparatory Steps for Grilling
Proper preparation is crucial for achieving mouthwatering ribs on a gas grill. These steps will ensure your ribs are flavorful and tender before they even hit the grates.
Removing the Membrane
Start by removing the thin membrane on the back of the ribs. This step is essential for allowing flavors to penetrate the meat and ensuring a tender texture.
- Flip the ribs bone-side up.
- Use a butter knife to lift a corner of the membrane.
- Grip the membrane with a paper towel and pull it off in one piece.
If the membrane is left on, it can become tough and chewy when cooked.
Applying the Dry Rub
A well-balanced dry rub enhances the natural flavor of the ribs and creates a delicious crust. Mix your own rub or use a store-bought blend.
Ingredients for a basic dry rub:
- 2 tablespoons brown sugar
- 1 tablespoon paprika
- 1 teaspoon garlic powder
- 1 teaspoon onion powder
- 1 teaspoon black pepper
- 1 teaspoon salt
Apply the rub generously to both sides of the ribs, massaging it into the meat. Let the ribs sit for at least 30 minutes before grilling to allow the flavors to penetrate.
Marinating for Flavor
Marinating adds depth and complexity to the taste of your ribs. While optional, it can significantly enhance the final result.
Simple marinade recipe:
- 1/2 cup apple cider vinegar
- 1/4 cup olive oil
- 2 cloves minced garlic
- 1 tablespoon Worcestershire sauce
- 1 teaspoon dried thyme
Mix the ingredients and place the ribs in a large, shallow dish. Pour the marinade over the ribs, ensuring they’re evenly coated. Cover and refrigerate for 2-4 hours, turning occasionally.
Drain the marinade before applying the dry rub and grilling. This combination of marinating and dry rub application will result in ribs bursting with flavor.
Grilling Equipment Setup
Properly setting up your gas grill is crucial for achieving mouthwatering ribs. The right equipment and techniques can elevate your grilling game and infuse smoky flavors into your meat.
Using a Gas Grill
Gas grills offer precise temperature control and convenience for cooking ribs. Set up your grill for indirect cooking by turning off burners on one side. This creates a cooler zone for slow-cooking ribs without direct flame contact.
Preheat the grill to 225-250°F (107-121°C) for optimal rib cooking. Use a reliable thermometer to monitor grill temperature throughout the cooking process.
Clean grates thoroughly before cooking to prevent sticking and ensure even heat distribution. Lightly oil the grates with a high smoke point oil like canola or grapeseed.
Adding a Smoker Box
A smoker box enhances the flavor profile of gas-grilled ribs. Place it directly on the lit burners or over the heat source. Fill the box with pre-soaked wood chips of your choice.
As the chips heat up, they release aromatic smoke that infuses the ribs. Replenish wood chips every 30-45 minutes to maintain consistent smoke production.
Some gas grills come with built-in smoker boxes. If yours doesn’t, aftermarket boxes are readily available and easy to use.
Utilizing Wood Chips for Smoky Flavor
Wood chips are essential for imparting smoky flavors to ribs on a gas grill. Popular options include hickory, applewood, and oak. Each wood type offers distinct flavor profiles.
Soak wood chips in water for 30 minutes before use. This prevents them from burning too quickly and produces longer-lasting smoke. Drain the chips before adding them to the smoker box.
For a more intense smoky flavor, use a mix of different wood types. Experiment with combinations to find your preferred taste. Start with milder woods like applewood and gradually introduce stronger flavors like hickory or mesquite.
Cooking Process Overview
Achieving mouthwatering ribs on a gas grill requires careful attention to temperature control and cooking technique. The process involves preheating, using indirect heat, managing cook time, and checking doneness for optimal results.
Preheating the Grill
Set up the gas grill for indirect cooking by turning off burners on one side. Preheat to 225-250°F (107-121°C). This temperature range allows for slow, even cooking.
Place a drip pan filled with water under the grates on the cool side. The water helps maintain moisture and catches drippings.
For smoky flavor, soak wood chips in water for 30 minutes. Drain and place them in a smoker box or aluminum foil pouch with holes. Position the wood over a lit burner.
Grilling with Indirect Heat
Place the prepared ribs on the cool side of the grill, bone-side down. Close the lid to trap heat and smoke.
Resist the urge to flip the ribs frequently. Minimal handling helps develop a flavorful crust.
Baste the ribs with apple juice or a vinegar-based mop sauce every 30-45 minutes for added moisture and flavor.
Managing Cooking Time and Temperature
Cook ribs low and slow for 2-3 hours. Maintain a steady temperature between 225-250°F (107-121°C).
Monitor grill temperature using a built-in thermometer or an external probe. Adjust gas burners as needed to maintain consistent heat.
For extra tenderness, wrap ribs in foil after the first 2 hours. This technique, known as the “Texas Crutch,” helps break down connective tissues.
Checking Doneness with a Meat Thermometer
Use a meat thermometer to check for doneness. Insert it into the thickest part of the meat, avoiding bones.
Ribs are generally done when they reach an internal temperature of 190-195°F (88-91°C).
Visual cues: The meat should pull back from the bones by about 1/4 inch. When lifted with tongs, the rack should bend slightly without breaking.
Perform the “bounce test” by holding one end of the rack with tongs. If the meat cracks when bounced, it’s likely overcooked.
Basting and Glazing Techniques
Basting and glazing are crucial techniques for creating flavorful, sticky, and caramelized ribs. These methods enhance the taste and texture of your barbecue, turning good ribs into great ones.
Homemade vs. Store-Bought BBQ Sauce
Homemade BBQ sauce offers customization and fresh flavors. Mix ketchup, brown sugar, vinegar, and spices for a basic sauce. Adjust sweetness, acidity, and heat to taste. Add liquid smoke for depth.
Store-bought sauces provide convenience and consistency. Choose high-quality brands with natural ingredients. Read labels to avoid excessive additives or preservatives.
For a compromise, doctors up store-bought sauce with extra ingredients. Add honey, hot sauce, or bourbon to create a unique flavor profile.
Test different options to find your preferred sauce. Consider making a large batch of homemade sauce to freeze for future use.
The Art of Basting
Basting involves brushing or mopping sauce onto the ribs during cooking. This process adds flavor and moisture to the meat.
Start basting after the first hour of cooking. Apply sauce every 30 minutes for even coverage. Use a silicone brush or mop for easy application.
Thin the sauce with apple juice or vinegar for better absorption. This prevents a thick, gloppy layer on the ribs.
Be cautious when opening the grill to baste. Work quickly to maintain temperature. Close the lid immediately after basting to trap heat and smoke.
For a deeper flavor, baste with the meat’s own juices collected in a drip pan. This creates a rich, concentrated taste.
Applying the Final Glaze
The final glaze creates a shiny, sticky exterior on the ribs. Apply it during the last 15-30 minutes of cooking.
Increase grill temperature to 300-350°F (149-177°C) for the glazing phase. This helps caramelize the sauce without burning it.
Brush a thick layer of sauce on both sides of the ribs. Close the lid and cook for 5-10 minutes. Repeat this process 2-3 times for a buildable glaze.
Watch the ribs closely during glazing. The sugar in the sauce can burn quickly. Remove ribs from heat if the glaze starts to darken too much.
Let the ribs rest for 5-10 minutes after glazing. This allows the sauce to set and prevents it from sliding off when slicing.
Finishing and Serving
The final steps of preparing ribs on a gas grill are crucial for achieving tender, flavorful results. Proper wrapping, resting, and serving techniques elevate the dish to new heights.
Wrapping the Ribs in Foil
Wrap the ribs tightly in aluminum foil during the last hour of cooking. This technique, known as the “Texas Crutch,” helps retain moisture and tenderize the meat. Place the ribs on a sheet of heavy-duty foil, add a splash of apple juice or beer for extra flavor, and seal the package securely.
Return the wrapped ribs to the grill and continue cooking at 225°F for about an hour. The foil traps steam, which helps break down tough connective tissues.
For a crispy exterior, unwrap the ribs and place them back on the grill for 10-15 minutes before removing. This step caramelizes the sauce and creates a desirable bark on the surface.
Resting Time for Tender Meat
After removing the ribs from the grill, allow them to rest for 10-15 minutes. This resting period is essential for redistributing juices throughout the meat, resulting in more tender and flavorful ribs.
Place the ribs on a cutting board and tent them loosely with foil during the resting period. This helps maintain their temperature while preventing excessive steam buildup.
Avoid cutting into the ribs immediately after cooking, as this can cause the juices to escape, leaving the meat dry.
Serving Suggestions and Side Dishes
Serve the ribs whole or cut them into individual portions. Present them on a large platter garnished with fresh herbs for an appealing presentation.
Classic side dishes complement ribs perfectly. Consider serving:
- Creamy coleslaw
- Baked beans
- Potato salad
- Grilled corn on the cob
- Mac and cheese
For a complete meal, offer a variety of barbecue sauces on the side. This allows guests to customize their ribs to their preferred flavor profile.
Pair the ribs with cold beverages like iced tea or light beer to balance the rich flavors of the meat and sides.
Tips and Tricks for Perfect Ribs
Mastering the art of grilling ribs requires attention to detail and a few key techniques. The following tips will help you achieve tender, flavorful ribs with that authentic barbecue taste.
Preventing Flare-Ups
Flare-ups can quickly ruin your ribs by charring the exterior. To avoid this, trim excess fat before grilling. Leave a thin layer for flavor, but remove large deposits that could drip and ignite.
Place a drip pan beneath the ribs to catch fat and juices. This not only prevents flare-ups but also collects flavorful drippings for basting or making sauce.
Consider using a two-zone fire setup. Place the ribs on the cooler side of the grill, away from direct heat. This allows for more controlled cooking and reduces the risk of flare-ups.
Achieving Low and Slow Cooking
Low and slow is the mantra for perfect ribs. Set your gas grill to maintain a temperature between 225-250°F (107-121°C). This gentle heat allows the connective tissues to break down gradually, resulting in tender meat.
Use indirect heat by turning off burners directly under the ribs. This creates an oven-like environment, ideal for slow cooking.
Consider the 3-2-1 method:
- Smoke ribs for 3 hours
- Wrap in foil with liquid for 2 hours
- Unwrap and grill for 1 hour
This technique ensures moist, fall-off-the-bone ribs while developing a flavorful crust.
Enhancing Smoky Flavors
To add smoky depth to gas-grilled ribs, use wood chips. Soak chips in water for 30 minutes, then place them in a smoker box or aluminum foil pouch with holes punched in it.
Position the smoker box over a lit burner. Once it starts smoking, move it to the side and place your ribs on the grill.
Experiment with different wood types:
- Hickory: Strong, bacon-like flavor
- Apple: Mild, sweet taste
- Mesquite: Intense, earthy notes
Add smoked paprika to your dry rub for an extra layer of smokiness. This spice imparts a rich, smoky flavor even without wood chips.