Cooking ham can seem daunting, but it’s actually quite simple with the right techniques. Whether you’re preparing a holiday feast or a weeknight dinner, a perfectly cooked ham can be the star of the meal. To cook ham, preheat the oven to 325°F, place the ham on a rack in a roasting pan, and bake until it reaches an internal temperature of 140°F.
The cooking time depends on the type and size of ham. A whole bone-in ham weighing 10-14 pounds typically takes 15-18 minutes per pound. For a half bone-in ham of 5-7 pounds, adjust the cooking time accordingly. Scoring the outside of the ham in a crosshatch pattern before baking can enhance its appearance and flavor absorption.
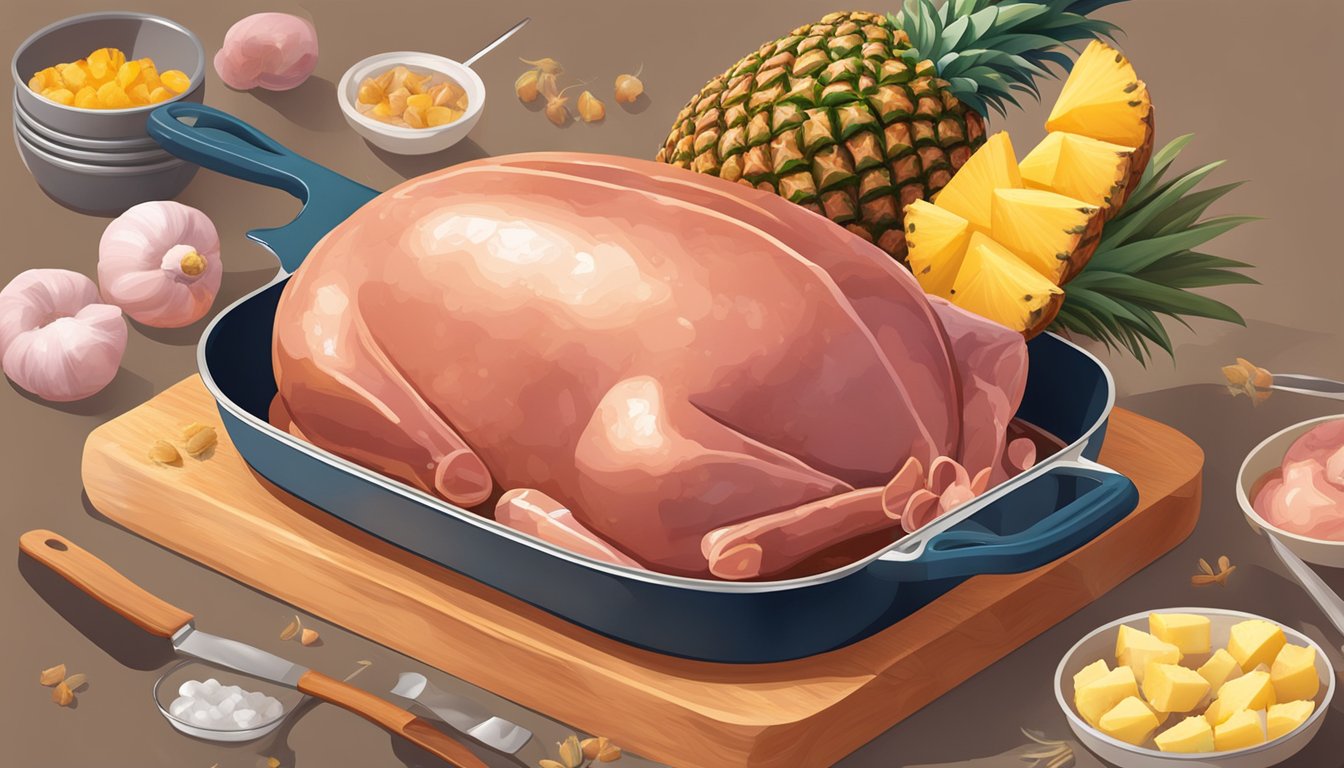
To elevate your ham, consider adding a glaze. Popular options include honey, pineapple, or brown sugar-based glazes. Apply the glaze during the last 30 minutes of cooking for a deliciously caramelized exterior. Once cooked, let the ham rest for 15-20 minutes before carving to ensure juicy, flavorful slices.
Understanding Ham Varieties
Ham comes in many forms, each with distinct characteristics that affect flavor, texture, and cooking methods. The type of ham you choose can greatly impact your meal preparation and final result.
City Ham vs. Country Ham
City ham is wet-cured and often smoked. It’s the most common variety found in supermarkets. City ham is typically mild and moist, requiring minimal preparation.
Country ham is dry-cured and aged. It has a more intense, salty flavor. This type needs soaking before cooking to reduce saltiness. Country ham is often served in thin slices due to its strong taste.
Whole Ham vs. Half Ham
Whole hams weigh 15-20 pounds and feed large gatherings. They include both the butt and shank portions.
Half hams are more manageable for smaller groups. The butt half is meatier but harder to carve. The shank half has less meat but is easier to slice.
Bone-In vs. Boneless Ham
Bone-in hams have better flavor and texture. The bone adds depth to soups and stews after the ham is eaten.
Boneless hams are convenient for slicing and serving. They’re often reshaped after boning, which can affect texture.
Spiral-Sliced Ham
Spiral-sliced hams are pre-cut in a continuous spiral. This makes serving easier but can lead to dryness if not carefully reheated.
These hams often come with a glaze packet. Apply the glaze during the last 30 minutes of heating for best results.
Fresh, Cured, and Smoked Ham
Fresh ham is uncured pork leg. It requires full cooking and seasoning.
Cured ham is treated with salt, nitrates, and sometimes sugar. It’s ready to eat but often benefits from heating.
Smoked ham has additional flavor from wood smoke. It can be fully cooked or require further cooking, depending on the type.
Preparation Essentials for Baking Ham
Proper preparation is key to achieving a perfectly baked ham. The right equipment, oven temperature, and techniques for scoring and glazing will ensure a delicious result.
Selecting a Roasting Pan
Choose a roasting pan that comfortably fits your ham with some extra space around the edges. A heavy-duty pan with a rack is ideal. The rack elevates the ham, allowing heat to circulate evenly.
If using a disposable aluminum pan, reinforce it by placing it on a sturdy baking sheet. This prevents bending when moving the ham in and out of the oven.
For easy cleanup, line the pan with aluminum foil. Some recipes suggest adding water or other liquids to the bottom of the pan to create steam and keep the ham moist during cooking.
Preheating Your Oven
Set your oven to 325°F (165°C) for most ham baking recipes. This moderate temperature allows the ham to heat through without drying out.
Place an oven rack in the lower third of the oven to accommodate the height of the ham and roasting pan. Ensure there’s enough clearance to prevent the ham from touching the top heating elements.
Allow sufficient time for the oven to fully preheat before inserting the ham. This ensures consistent cooking from start to finish.
Scoring the Ham
Scoring the ham’s surface creates a visually appealing diamond pattern and allows the glaze to penetrate deeper into the meat. Use a sharp knife to make shallow cuts about 1/4 inch deep.
Create a diagonal pattern by making parallel cuts about 1 inch apart in one direction, then repeat in the opposite direction to form diamonds.
Be careful not to cut too deeply, as this can cause the ham to dry out during baking. Scoring is typically done on spiral-cut hams or those with a layer of fat on the outside.
Applying the Glaze
A glaze adds flavor and creates a caramelized exterior on the ham. Common glaze ingredients include brown sugar, honey, mustard, and fruit juices.
Apply the glaze in stages for best results. Start with a thin layer about 30 minutes before the ham is done cooking. Brush on additional layers every 10-15 minutes.
For a more intense flavor, some cooks prefer to apply the glaze at the very end of cooking and increase the oven temperature to 475°F for 5-7 minutes to caramelize the sugars.
Use a basting brush or spoon to evenly distribute the glaze over the entire surface of the ham, paying special attention to the scored areas.
Cooking Your Ham to Perfection
Properly cooking a ham requires attention to detail and careful timing. The key steps include calculating cooking times, mastering oven baking techniques, using a meat thermometer, and allowing the ham to rest before carving.
Calculating Cooking Times
Ham cooking times vary based on weight and whether the ham is raw or pre-cooked. For a fully cooked ham, allow 15-20 minutes per pound at 325°F. Raw hams require 20-25 minutes per pound. A 10-pound ham typically needs 2.5-3 hours of cooking time.
Use this table as a general guide:
| Ham Type | Weight | Cooking Time |
|---|---|---|
| Fully Cooked | 5-7 lbs | 1.5-2 hours |
| Fully Cooked | 10-14 lbs | 2.5-3.5 hours |
| Raw | 5-7 lbs | 2-2.5 hours |
| Raw | 10-14 lbs | 3-4 hours |
Always check the package instructions for specific recommendations.
Oven Baking Technique
Preheat the oven to 325°F. Place the ham cut-side down on a rack in a roasting pan. Score the surface in a diamond pattern, about 1/8-inch deep. Cover the ham with foil to prevent drying.
Bake according to the calculated time. Remove the foil during the last 30 minutes to allow the surface to brown. If using a glaze, apply it during this final stage.
For even cooking, rotate the pan halfway through the baking time. This ensures all sides of the ham are exposed to the oven’s heat evenly.
Using a Meat Thermometer
A meat thermometer is essential for determining when the ham is fully cooked. Insert it into the thickest part of the ham, avoiding bone or fat.
For pre-cooked hams, the internal temperature should reach 140°F. Raw hams need to reach 145°F. Begin checking the temperature about 30 minutes before the estimated end of cooking time.
If the ham is heating too quickly, cover it with foil. If it’s cooking too slowly, increase the oven temperature by 25°F.
Resting the Ham before Carving
After reaching the proper internal temperature, remove the ham from the oven. Let it rest for 15-20 minutes before carving. This allows the juices to redistribute throughout the meat, resulting in a more tender and flavorful ham.
Cover the ham loosely with foil during the resting period to keep it warm. Place it on a cutting board with a channel to catch any juices.
Use this time to prepare your carving tools and serving platter. Once rested, the ham will be easier to slice and will retain more moisture when served.
Serving Suggestions and Accompaniments

Ham is a versatile main dish that pairs well with a variety of sides and beverages. Proper carving techniques and thoughtful accompaniments elevate the dining experience for your guests.
Carving the Ham for Your Guests
Start by placing the ham on a stable cutting board. For a spiral-cut ham, follow the pre-cut lines for easy slicing. For a whole ham, use a sharp carving knife to make thin, parallel cuts against the grain. Begin at the narrower end and work your way towards the thicker portion.
Aim for slices about 1/4 inch thick. If serving a bone-in ham, cut around the bone to release more meat. For ham steaks, simply slice them into individual portions. Arrange the carved ham neatly on a serving platter, garnishing with fresh herbs or fruit slices for visual appeal.
Side Dishes to Complement Your Ham
Glazed ham pairs exceptionally well with both savory and sweet side dishes. Scalloped potatoes offer a creamy, indulgent complement to the salty ham. Roasted vegetables like asparagus, green beans, or carrots provide a fresh contrast.
For starch options, consider:
- Mashed potatoes
- Cornbread
- Mac and cheese
Sweet sides balance the ham’s saltiness:
- Glazed carrots
- Candied sweet potatoes
- Pineapple casserole
Don’t forget classic additions like deviled eggs or a crisp green salad to round out the meal.
Pairing Beverages
The right beverages can enhance the flavors of your ham dinner. For non-alcoholic options, apple cider is a festive choice that complements the ham’s sweetness. Sparkling water with a splash of cranberry juice offers a refreshing contrast.
Wine pairings for ham include:
- Riesling
- Pinot Noir
- Zinfandel
Beer enthusiasts might enjoy a Belgian ale or a fruit-forward cider. For cocktails, consider a whiskey-based Old Fashioned or a gin and tonic with a twist of lemon. These options provide a balanced counterpoint to the rich, savory flavors of the ham and its accompaniments.
Storing and Making the Most of Leftover Ham
Proper storage and creative repurposing can extend the life and enjoyment of leftover ham. Following safe storage practices ensures food quality and safety, while exploring inventive recipes transforms leftovers into delicious new meals.
Safely Storing Leftover Ham
Store leftover ham in an airtight container in the refrigerator at 40°F (4°C) or below. Properly stored, cooked ham remains safe to eat for 3-5 days.
For longer storage, freeze leftover ham. Wrap it tightly in plastic wrap or aluminum foil, then place in a freezer bag. Remove as much air as possible before sealing. Frozen ham maintains quality for 1-2 months.
Label containers with the date to track storage time. Thaw frozen ham in the refrigerator, never at room temperature. Use thawed ham within 3-4 days.
Creative Ideas for Leftover Ham
Diced leftover ham adds flavor to omelets, quiches, and frittatas. Stir it into pasta dishes or use as a pizza topping.
Create hearty soups and stews using leftover ham. A ham bone infuses broths with rich flavor. Simmer it with vegetables and beans for a satisfying meal.
Make ham salad by finely chopping leftover ham and mixing with mayonnaise, mustard, and diced vegetables. Serve on sandwiches or with crackers.
Try ham and cheese sliders, ham fried rice, or ham and potato casserole. Leftover ham also works well in scalloped potatoes, macaroni and cheese, or breakfast hash.
Ham for Special Occasions
Ham serves as a centerpiece for many festive gatherings, from Easter brunches to Christmas dinners and lively parties. Selecting the right ham and preparing it properly ensures a memorable meal for your guests.
Choosing a Ham for Easter
Easter calls for a succulent ham to grace the holiday table. Opt for a bone-in ham for maximum flavor. A 10-12 pound ham typically feeds 12-14 people. Look for hams labeled “ham with natural juices” for best quality.
Consider a honey-glazed ham for a touch of sweetness. Apply the glaze during the last 30 minutes of cooking to prevent burning. Garnish with fresh herbs and spring vegetables for a festive presentation.
Serve your Easter ham with classic sides like scalloped potatoes, asparagus, and hot cross buns. Don’t forget to save the bone for making soup later.
Holiday Ham for Christmas
A Christmas ham tradition dates back centuries. Choose a spiral-cut ham for ease of serving. These come pre-sliced and cook evenly.
For a 10-pound ham, plan on about 2 hours of cooking time at 325°F. Cover with foil to prevent drying. Uncover during the last 30 minutes to crisp the edges.
Create a festive glaze using brown sugar, maple syrup, and spices like cinnamon and cloves. Brush it on every 15 minutes during the final hour of cooking.
Pair your Christmas ham with cranberry sauce, roasted root vegetables, and warm dinner rolls. Leftovers make excellent sandwiches or additions to breakfast dishes.
Hosting with Ham for Parties
Ham shines as a crowd-pleasing option for parties and gatherings. A bone-in, fully cooked ham simplifies preparation. Plan for 1/2 pound per person for a main dish.
Set up a ham carving station with a variety of mustards, chutneys, and relishes. Offer small rolls for guests to make sliders. Include a cheese board with sharp cheddars and creamy bries that pair well with ham.
For a casual affair, consider ham and biscuit sandwiches or ham-wrapped asparagus spears as easy appetizers. Leftover ham works great in quiches or breakfast casseroles for a post-party brunch.
Remember to have take-home containers ready for guests to enjoy leftovers. A well-prepared ham ensures your party will be remembered long after the last slice is served.
Additional Tips and Tricks
Mastering ham preparation involves more than just basic cooking techniques. Exploring specialized resources, seeking expert advice, and trying alternative methods can elevate your ham-cooking skills.
Recommended Cookbooks and Guides
“The Ham Cookbook” by Bruce Aidells offers comprehensive ham recipes and techniques. “Pig: King of the Southern Table” by James Villas covers traditional Southern ham preparations. Online resources like SeriousEats.com provide detailed guides on ham selection and cooking. These sources explain brining, glazing, and carving techniques. Many include tips for using leftovers creatively. Some cookbooks feature regional ham specialties from around the world, expanding your culinary repertoire.
Consulting with Butchers
Local butchers are valuable sources of ham knowledge. They can recommend the best cut for your needs and explain differences between ham types. Butchers often provide seasoning suggestions and cooking time estimates based on ham size. Some offer pre-brined or flavored hams for convenience. Ask about bone-in versus boneless options and their impact on flavor and texture. Butchers may also share tips on scoring the ham’s surface for optimal flavor absorption.
Alternative Cooking Methods
Slow cookers offer a hands-off approach to ham preparation. Place a 3-4 pound ham in the slow cooker with 1/2 cup water or broth. Cook on low for 5-6 hours until tender. Glaze during the last hour if desired. Smoking imparts rich flavor to ham. Use a smoker at 225°F (107°C) for about 20 minutes per pound. Choose wood chips like hickory or apple for complementary flavors. Grilling ham creates a unique taste. Wrap in foil and grill over indirect heat for 15-20 minutes per pound. Finish unwrapped for a crispy exterior.