Crispy oven-baked wings offer a healthier alternative to deep-fried chicken without sacrificing flavor or texture. Achieving that coveted crunch on the outside while maintaining juicy meat inside is possible with a few key techniques. The secret lies in using baking powder to break down the skin and create a crispy exterior, combined with a specific temperature and cooking method.
These wings are perfect for game day snacks, parties, or simply satisfying a craving for crispy chicken. By baking instead of frying, you reduce the amount of oil used while still getting that satisfying crunch. The cooking process is straightforward, requiring minimal hands-on time and allowing you to focus on preparing your favorite dipping sauces or side dishes.
Understanding Chicken Wings
Chicken wings are a popular and versatile appetizer or main dish. They consist of three distinct parts and can be prepared using various cooking methods, with oven baking offering a healthier alternative to deep frying.
Types of Chicken Wings
Chicken wings are divided into three main parts: the drumette, the flat or wingette, and the tip. Drumettes resemble miniature drumsticks and contain dark meat. Wingettes are flat with two small bones and tender meat. The wing tip is mostly skin and cartilage, often discarded or used for making stock.
Whole wings include all three sections. Many restaurants and home cooks prefer to separate the wings into drumettes and flats for easier eating and more consistent cooking.
Some recipes call for “party wings,” which are already separated into drumettes and flats. This saves preparation time but may cost more than whole wings.
Benefits of Oven Baking
Oven baking chicken wings offers several advantages over deep frying. It requires less oil, resulting in a lower calorie count and reduced fat content. This makes oven-baked wings a healthier option for those watching their diet.
Baking allows for more even cooking and crispy skin without the need for constant attention. It’s also less messy and safer than dealing with hot oil.
Oven-baked wings can achieve a crispy exterior by using techniques like patting the wings dry, adding baking powder to the seasoning, or using a wire rack to elevate them. This allows hot air to circulate, creating a crispy texture similar to fried wings.
Baking also allows for easy flavor customization through marinades, rubs, or sauces without compromising the crispy skin.
Preparation Essentials
Achieving crispy oven-baked wings requires attention to key steps and ingredients. Proper preparation sets the foundation for perfectly crisp and flavorful results.
Choosing the Best Wings
Select fresh chicken wings from a reputable source. Look for plump, meaty wings with intact skin. Opt for a mix of drumettes and flats for variety. Frozen wings can work but may not crisp up as well. If using frozen, thaw completely in the refrigerator before cooking. Pat dry with paper towels to remove excess moisture. This helps the skin crisp up during baking.
Preparation Techniques
Pat wings dry thoroughly with paper towels. Excess moisture prevents crispy skin. For extra crispiness, refrigerate uncovered for 12-24 hours. This dries out the skin further. Use a wire rack on a baking sheet lined with foil. The elevated rack allows hot air to circulate, crisping all sides. Spray the rack with cooking oil to prevent sticking.
Toss wings in a mixture of flour and baking powder. The baking powder helps break down proteins in the skin, promoting browning and crispiness. Use 1 tablespoon of baking powder per pound of wings.
Seasoning for Flavor
Create a dry rub for maximum flavor. Mix kosher salt, black pepper, garlic powder, and onion powder as a base. Add smoked paprika for smokiness and color. Include chili powder or cayenne for heat. Ground cumin adds depth.
Coat wings evenly with the seasoning blend. For best results, apply the dry rub before refrigerating. This allows flavors to penetrate the meat. Alternatively, toss wings in the seasoning just before baking.
For variety, experiment with different spice combinations. Try Italian herbs, lemon pepper, or BBQ-inspired blends. Adjust heat levels to personal preference.
Cooking Process
Achieving crispy oven-baked wings involves a few key techniques. These methods ensure the skin crisps up perfectly while keeping the meat juicy and flavorful.
Baking Powder Method
Coating wings with baking powder is a game-changer for crispiness. Mix 1 tablespoon of baking powder with 1/4 teaspoon of salt for every pound of wings. Toss the wings in this mixture, ensuring even coverage. The baking powder draws moisture to the surface and promotes browning.
Let the coated wings sit uncovered in the refrigerator for 1-2 hours or overnight. This drying process further enhances crispiness. Before baking, pat the wings dry with paper towels to remove any excess moisture.
Baking powder, not baking soda, is crucial here. Baking soda can impart a metallic taste and is too alkaline for this application.
Setting the Oven Temperature
Proper oven temperature is vital for crispy wings. Preheat the oven to 425°F (218°C) for optimal results. This high temperature helps render fat and crisp the skin quickly.
Some recipes suggest starting at a lower temperature, around 250°F (121°C), for 30 minutes, then increasing to 425°F (218°C) for the remaining cooking time. This method slowly renders fat before crisping the skin.
Use an oven thermometer to ensure accuracy, as many ovens can be off by 25-50 degrees.
Using a Wire Rack
A wire rack elevates the wings, allowing hot air to circulate evenly. Place the rack on a baking sheet lined with aluminum foil or parchment paper for easy cleanup.
Arrange wings in a single layer on the rack, leaving space between each piece. This prevents steaming and ensures all sides crisp up.
If a wire rack isn’t available, use a baking sheet lined with parchment paper. Flip the wings halfway through cooking to promote even browning.
For extra crispiness, brush wings with a little oil before placing them on the rack. This helps the skin crisp up faster and more evenly.
Sauces and Dressings

Crispy oven-baked wings pair perfectly with a variety of flavorful sauces and dressings. The right sauce can elevate these wings from tasty to irresistible.
Buffalo and BBQ Sauces
Buffalo sauce is a classic choice for wings. It combines hot sauce, butter, and vinegar for a spicy, tangy kick. Mild, medium, and hot versions cater to different heat preferences.
BBQ sauce offers a sweet and smoky alternative. Options range from Kansas City-style thick and sweet to Carolina-style vinegar-based sauces. For a unique twist, try a bourbon or honey BBQ sauce.
Both buffalo and BBQ sauces can be tossed with wings after baking or served on the side for dipping.
Garlic Parmesan and Honey Garlic
Garlic Parmesan sauce blends minced garlic, melted butter, and grated Parmesan cheese. This creamy, savory option appeals to those who prefer non-spicy flavors.
Honey garlic sauce balances sweet and savory. It typically includes honey, soy sauce, garlic, and sometimes ginger. The result is a sticky, glossy coating that caramelizes beautifully on baked wings.
These sauces can be brushed on wings during the last few minutes of baking for extra flavor penetration.
Ranch and Blue Cheese Dressings
Ranch dressing, a cool and creamy blend of buttermilk, herbs, and spices, complements spicy wings perfectly. It’s often served as a dipping sauce.
Blue cheese dressing offers a tangy, bold flavor that pairs well with buffalo wings. Its chunks of pungent cheese provide textural contrast to crispy wings.
Both dressings can be store-bought or homemade. For the best flavor, prepare them a few hours before serving to allow flavors to meld.
Serving Suggestions
Crispy oven-baked wings make excellent party food and can be served in various ways. The right pairings and presentation elevate the wing-eating experience.
Pairing with Sides
Serve crispy wings with classic dips like blue cheese or ranch dressing. Celery and carrot sticks offer a cool, crunchy contrast. For a heartier meal, pair wings with french fries, onion rings, or potato wedges. Coleslaw or a fresh green salad can balance the richness of the wings.
Consider offering different sauce options for guests to customize their wings. Popular choices include buffalo sauce, barbecue sauce, honey garlic, or teriyaki. Provide small bowls or ramekins for dipping sauces.
Presentation Tips
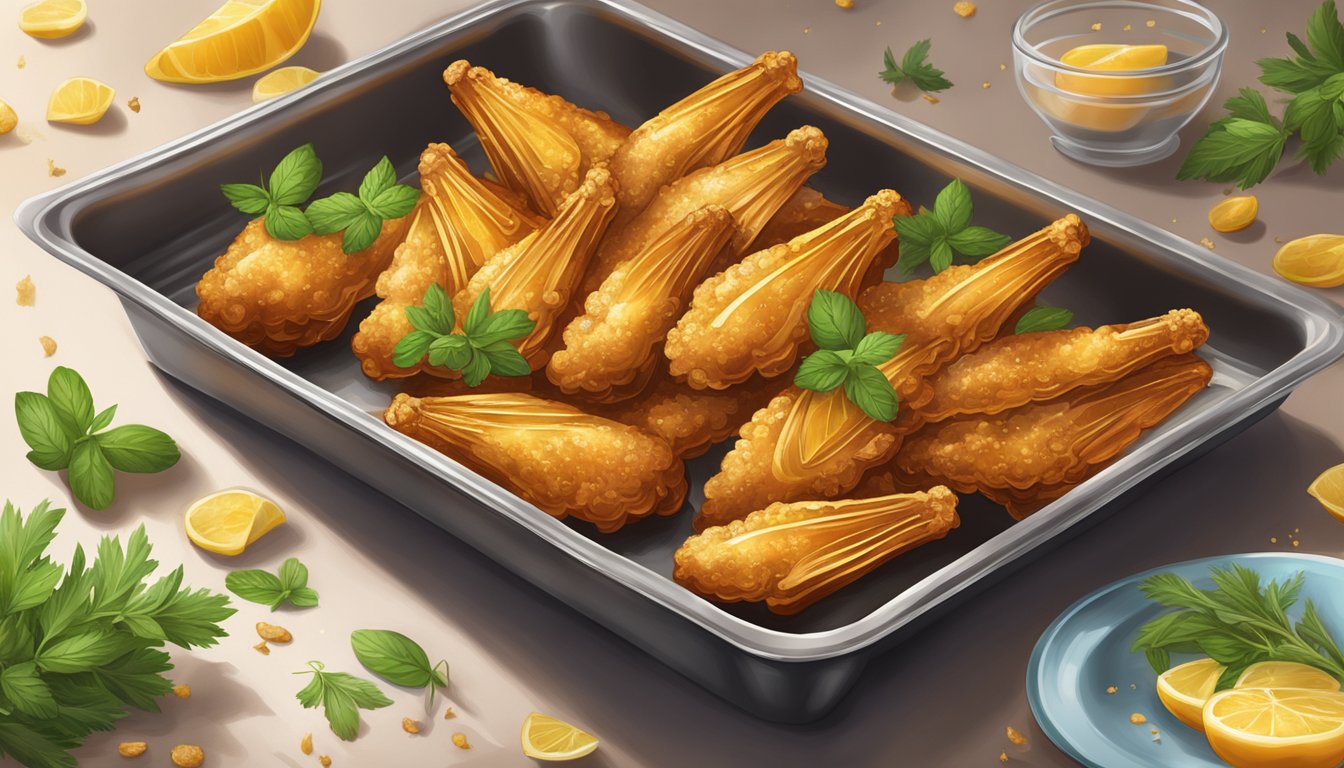
Arrange wings on a large platter for easy sharing at parties. Use a tiered serving stand to create an eye-catching display. Place wings in paper-lined baskets for an informal, pub-style presentation.
Garnish the platter with fresh herbs like parsley or cilantro for a pop of color. Include lemon wedges for guests who prefer a citrus kick. For a fun twist, serve wings in miniature metal buckets or on wooden boards.
Consider temperature when presenting. Use a warming tray to keep wings hot during extended serving times. Provide napkins and wet wipes for easy clean-up.
Storage and Reheating
Proper storage and reheating techniques are crucial for maintaining the quality and safety of crispy oven-baked wings. These methods help preserve flavor and texture while ensuring food safety standards are met.
Storing Leftovers
Store leftover crispy baked chicken wings in airtight containers or resealable plastic bags. Place them in the refrigerator within two hours of cooking. Properly stored wings can last 3-4 days in the fridge. For longer storage, freeze wings in freezer-safe bags or containers for up to 4 months.
Remove as much air as possible from storage containers to prevent freezer burn. Label containers with the date of storage for easy tracking. Separate wings into smaller portions for convenient reheating.
Reheating for Best Quality
Reheat wings in a preheated 350°F oven for optimal results. Place wings on a wire rack over a baking sheet to allow air circulation. Heat for 15-20 minutes, flipping halfway through. Check internal temperature reaches 165°F.
For crispier skin, broil wings for 1-2 minutes after reheating. Avoid microwaving, as it can make wings soggy. If reheating from frozen, add 5-10 minutes to cooking time.
Alternatively, use an air fryer at 375°F for 5-7 minutes. Shake basket halfway through for even heating. Serve immediately after reheating for best taste and texture.
Additional Tips
Achieving perfectly crispy oven-baked wings requires attention to detail and proper techniques. These tips will help you master the art of creating restaurant-quality wings at home without deep-frying.
Crispiness without Deep-Frying
Pat wings dry with paper towels before seasoning. This removes excess moisture, promoting crispier skin. Use baking powder in your seasoning mix – it helps break down proteins in the skin, resulting in a crunchier texture. Arrange wings on a wire rack set inside a baking sheet. This allows hot air to circulate, crisping all sides evenly.
Bake at a high temperature (400-425°F) for best results. Consider a two-temperature cooking method: start low, then finish high. This renders fat slowly, then crisps the skin. For extra crunch, broil wings for 2-3 minutes at the end of cooking time. Watch closely to prevent burning.
Dealing with Frozen Wings
Thaw frozen wings completely before baking. Partially frozen wings won’t crisp properly. Place frozen wings in the refrigerator overnight for best results. If short on time, submerge sealed packages in cold water, changing water every 30 minutes until thawed.
Pat thawed wings dry thoroughly. Excess moisture hinders crispiness. Season as usual, but add 5-10 minutes to cooking time. Check internal temperature reaches 165°F before serving. For emergency situations, cook frozen wings directly – increase cooking time by 50% and flip more frequently for even cooking.